
Installing Japanese keyboards on non-Japanese computers has gotten much easier in the past ten years. No more special discs with complicated software. In fact, just about every computer has a Japanese keyboard ready and waiting inside of it.
You just have to know how to get in there, turn it on, and make it work for you.
That's where we come in. We get a lot of emails from people struggling to install and switch between Japanese keyboards. In this guide we'll show you how to install Japanese keyboard inputs, set awesome shortcuts for better productivity, and type anything you could ever want, all without needing a "real" Japanese computer or keyboard.
Ready? レツゴーー!
- How to Install Japanese Keyboards on your Computer
- How to Install Japanese Keyboards on your Phone or Tablet
How to Install Japanese Keyboards on your Computer
The first thing you need to do is figure out what kind of computer you're using. If you don't know, here's an easy way to tell:
- If there's an apple on it, you've got a Mac.
- If not, you've a got a PC.
Kidding aside, you probably already know what kind of computer you have. It's a really good thing to know.
MacOS Sequoia
We'll start off with Mac instructions for installing Japanese keyboards.
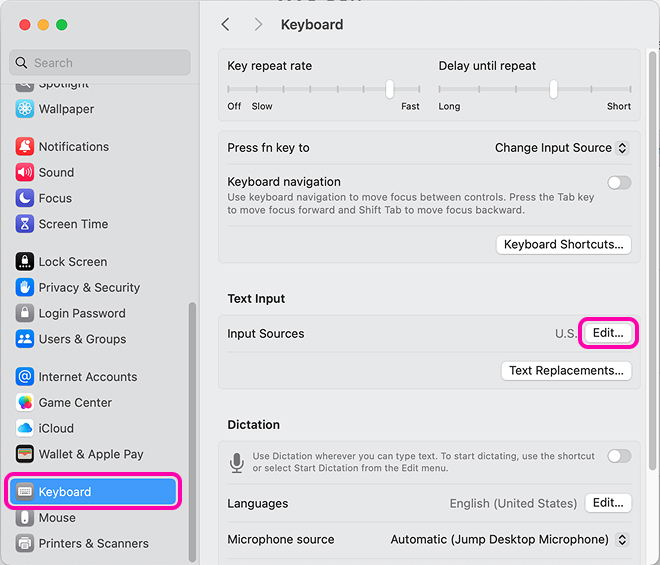
Go to System Settings > Keyboard.
Once in Keyboard, click the Edit button under the Text Input zone.
Click the + (plus) on the bottom left of the window.
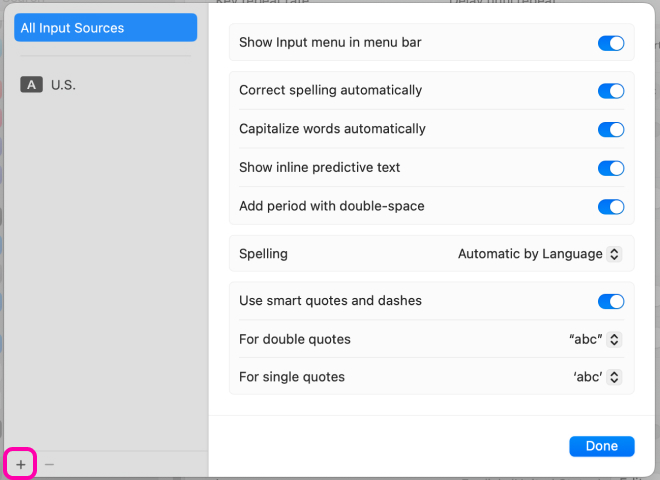
Search for Japanese and select the Japanese - Romaji keyboard to add.

Now you should see various options and input modes for your Japanese keyboard. By default, hiragana will be used when typing with this keyboard. Katakana can be used by pressing Caps Lock before typing, and romaji can be used by holding Shift while typing.

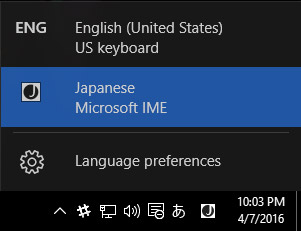
Now that you have your keyboards set up, you'll see them in the top right toolbar, right near the time.
If you want to be a slow, sad person, you can drag your mouse up there and click through when you want to switch between your keyboards.
Or, you can be an efficient Japanese beast switching from English to Japanese and back without even blinking! Shortcuts will show you the way.
OSX Shortcuts
Your keyboards will probably already have some shortcuts associated with them. Here are the defaults, which you can use whenever you want to switch between English and Japanese:
Next Input Source:
control + spacePrevious Input Source:
control + option + space
These keybind shortcuts can be changed or disabled in the System Settings > Keyboard menu where we started things out at!
Windows 10
Next, let's walk through how to install a Japanese keyboard in Windows 10.
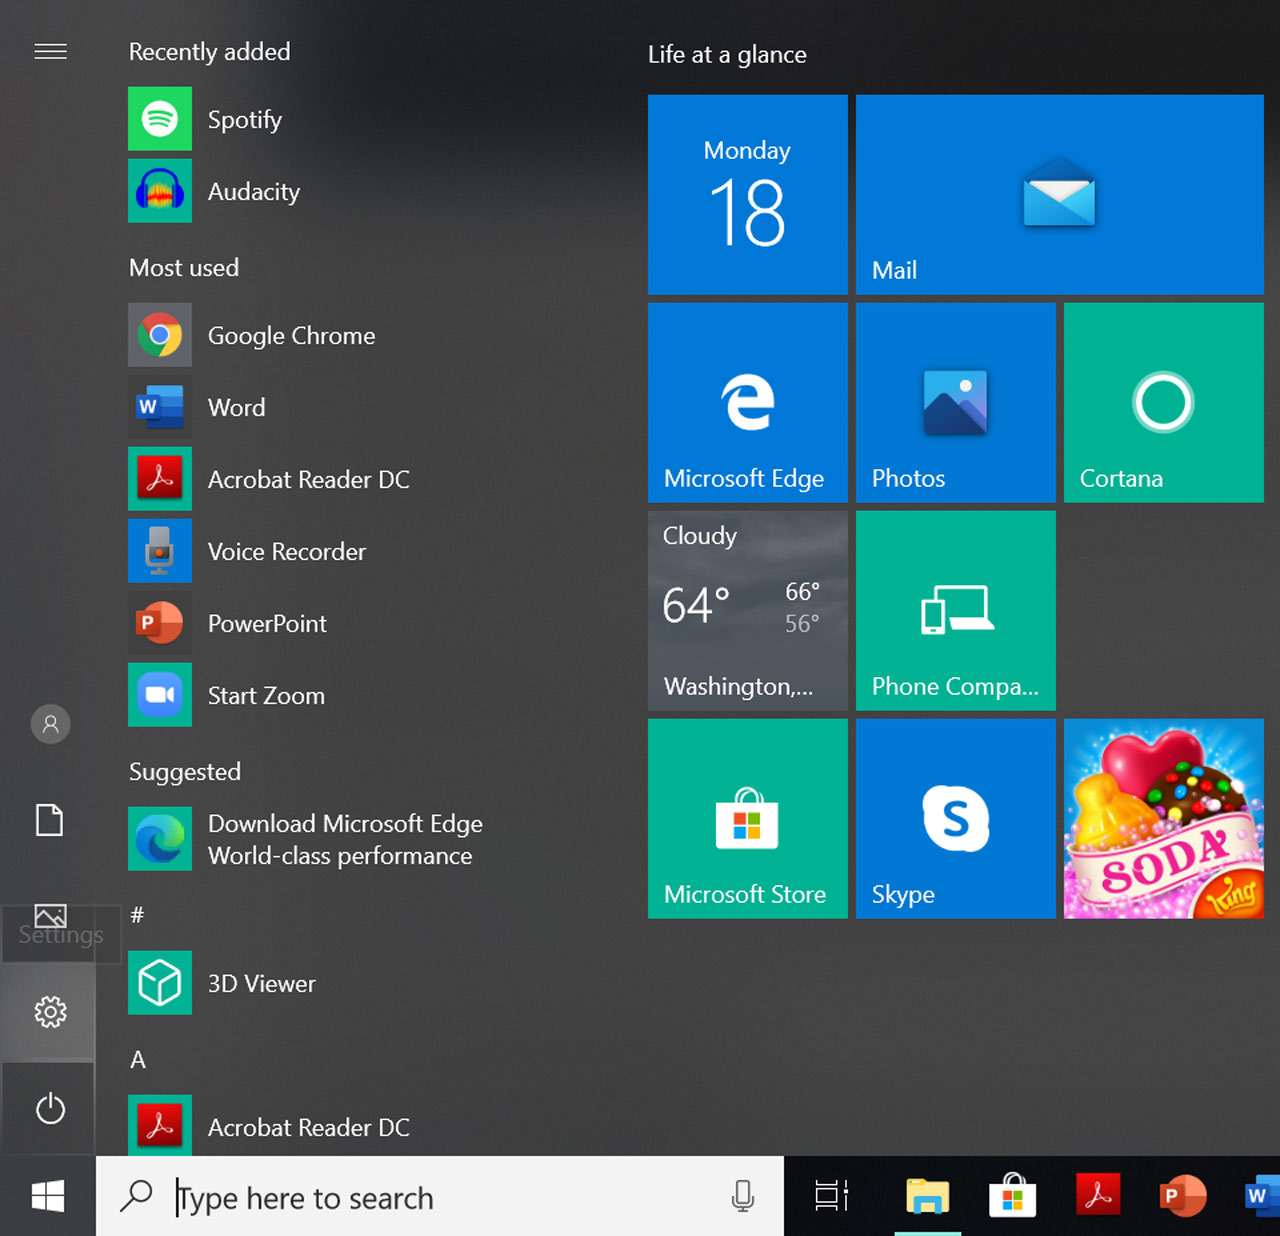
First, click on the little Windows symbol (the one that replaced the old Start bar) in the bottom left corner. From there, click on the cogwheel icon to naviate to Settings.
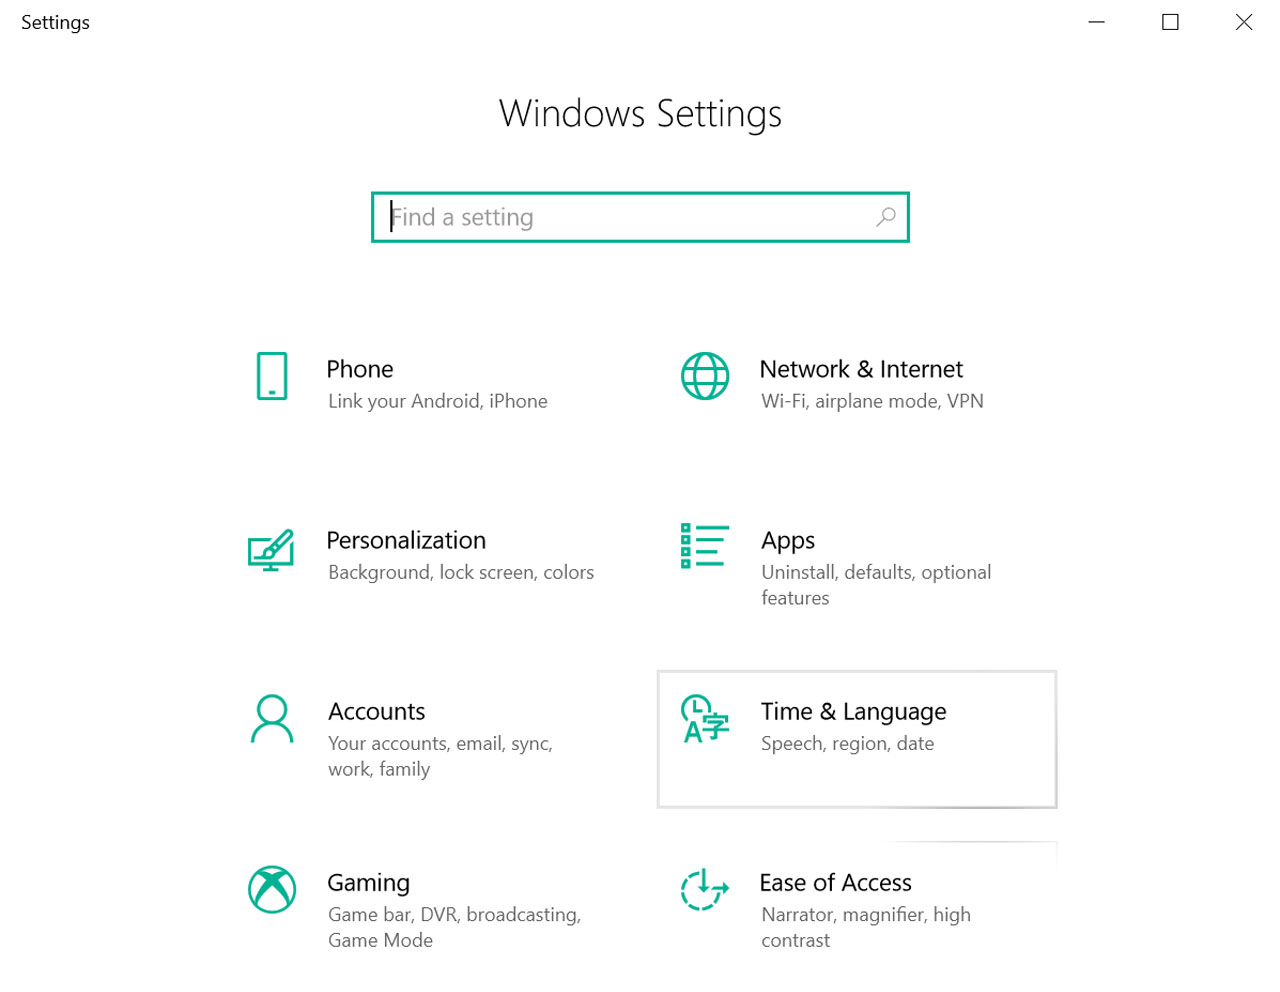
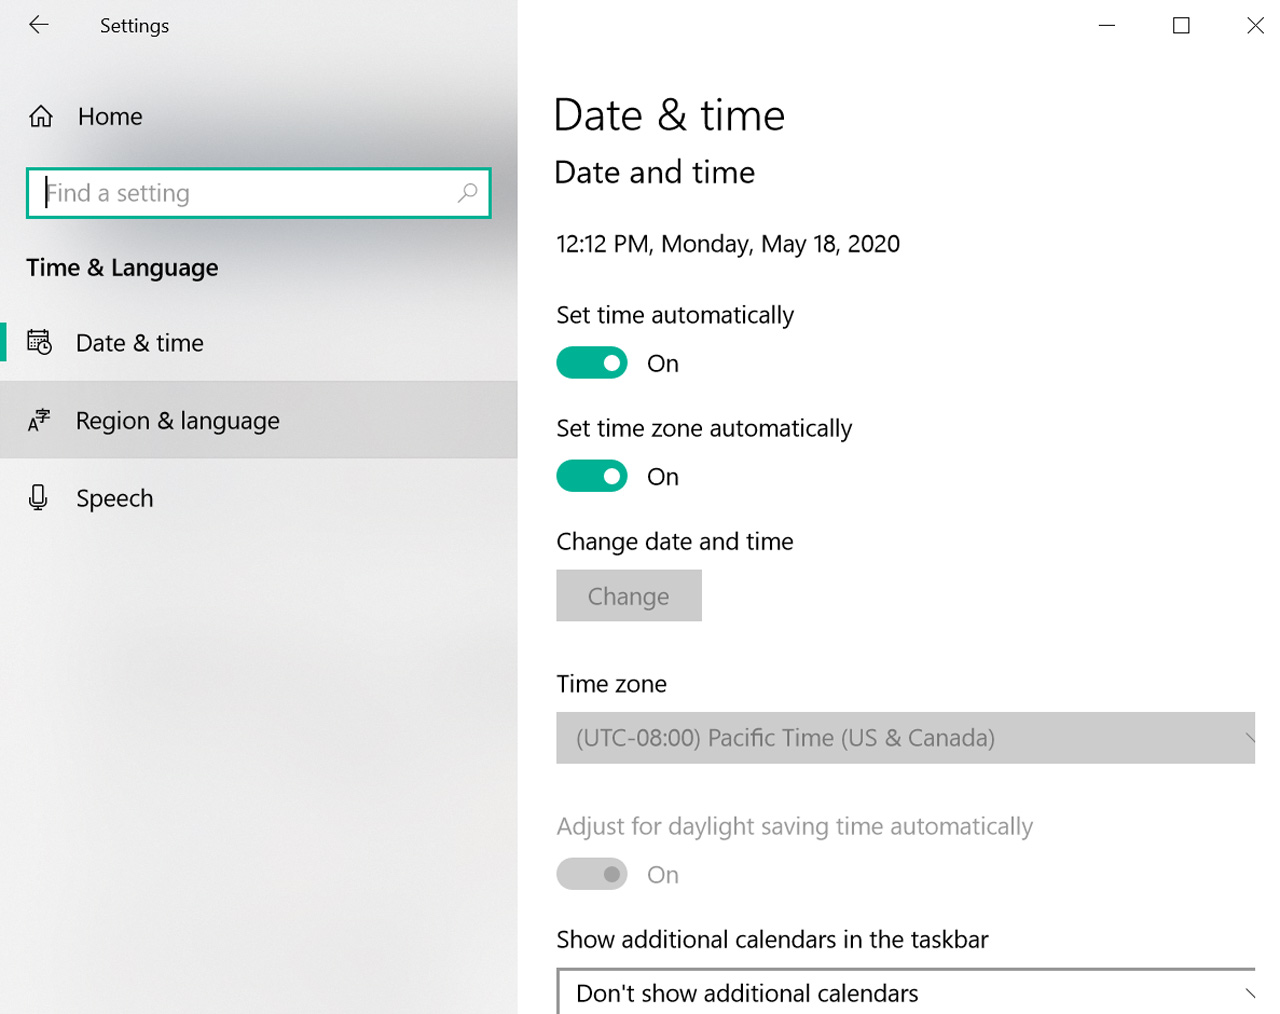
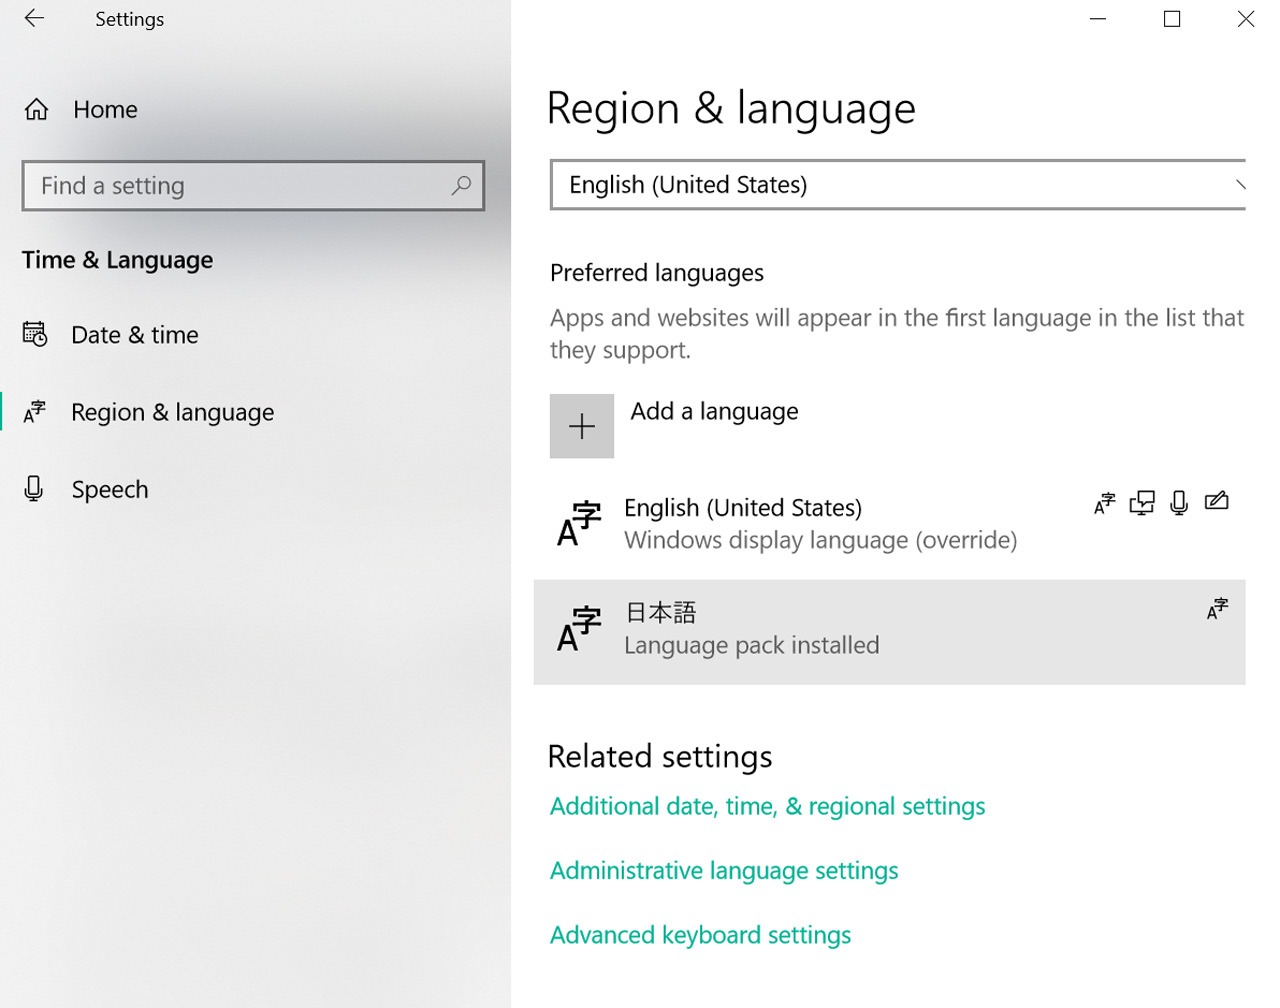
Inside Settings, you'll see a menu with eight buttons. Click on Time & Language.
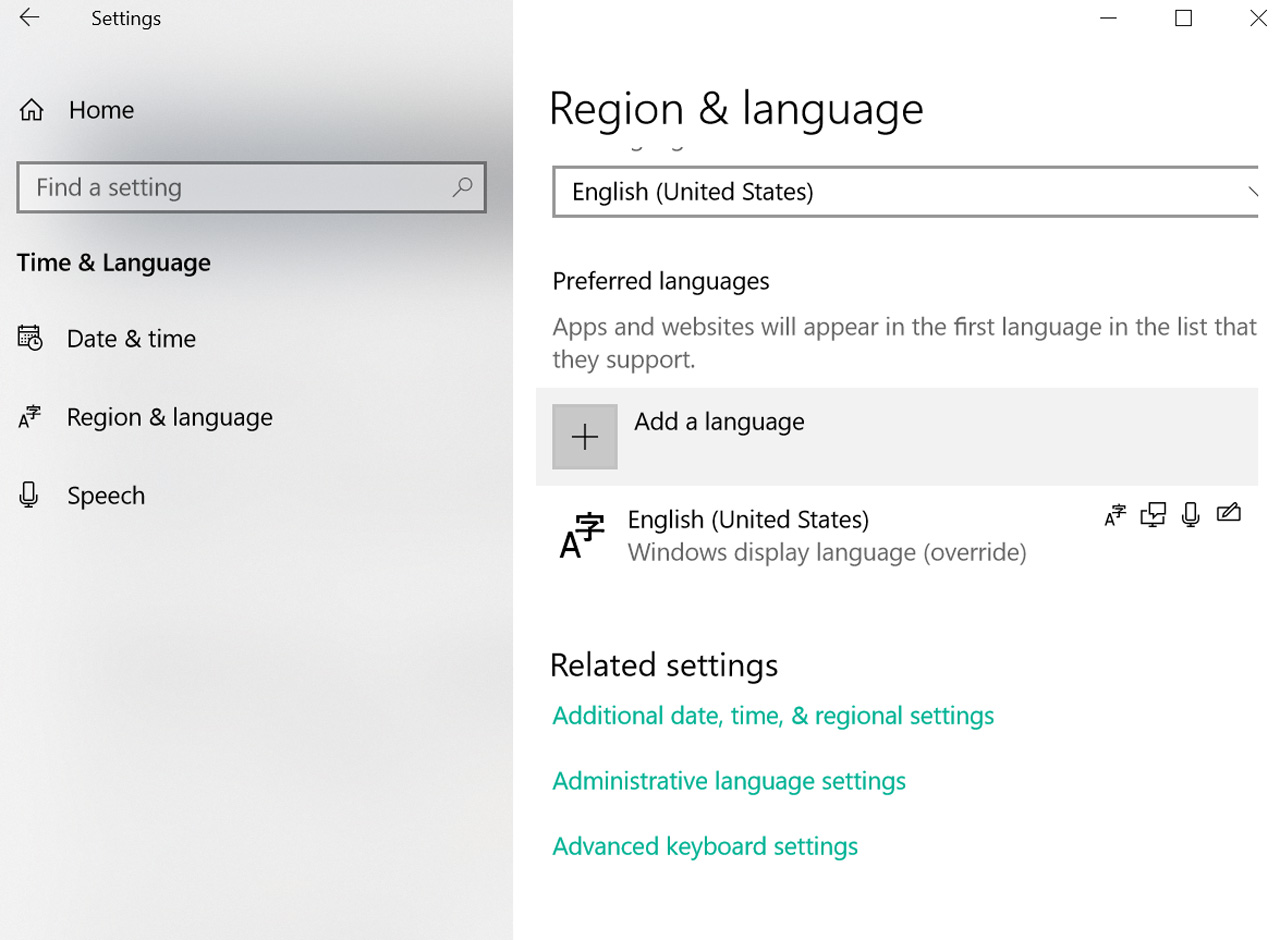
A window will open with Date & time settings. Click on Region & language.
Once you're on the Region & language screen, click the Add a language button.
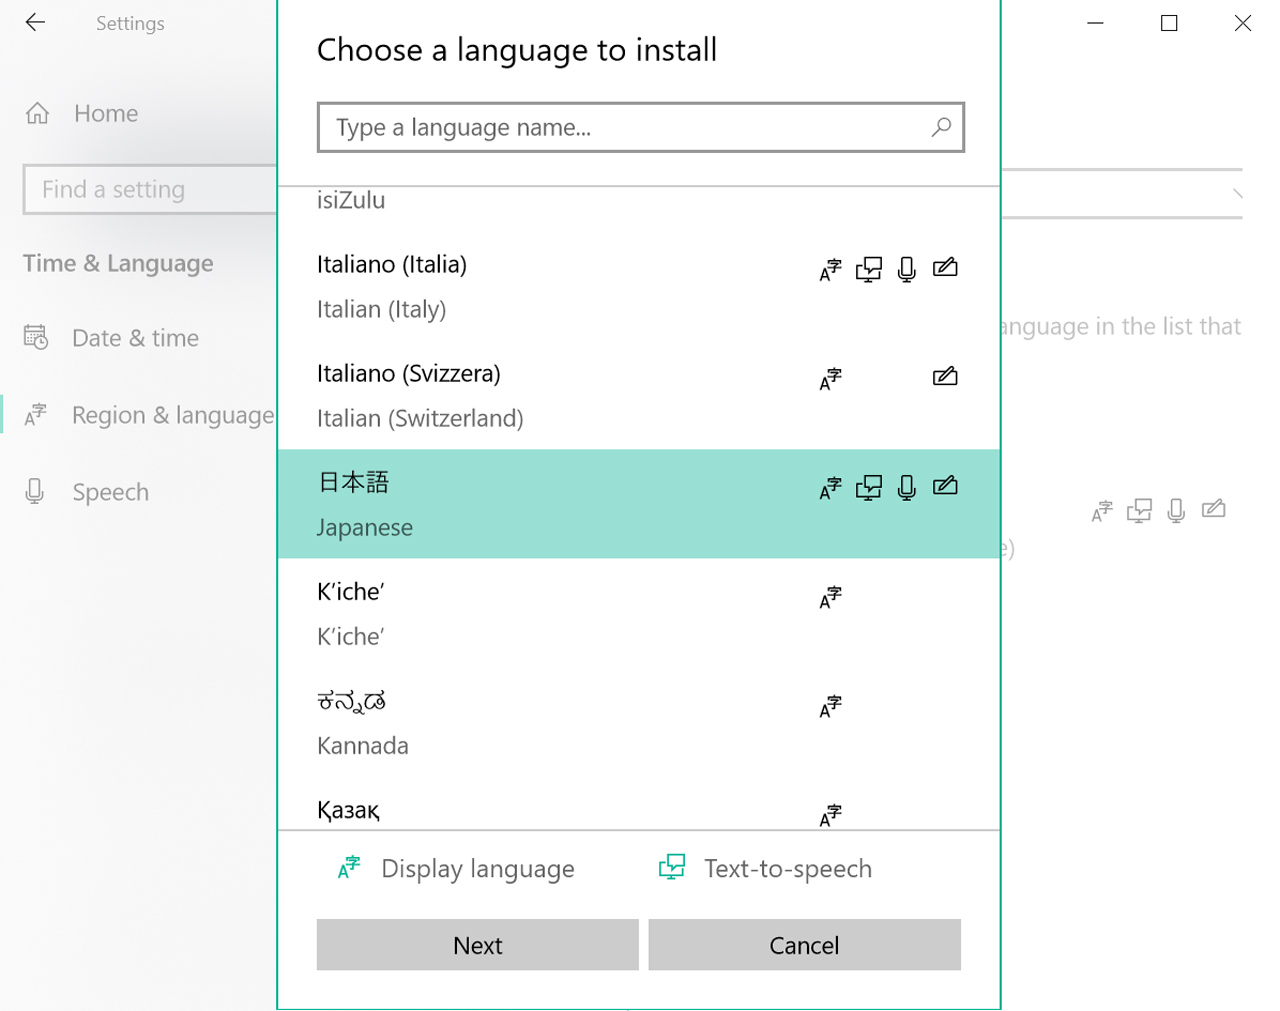
You'll see a bunch of languages in big boxes. Either Scroll down or use the search box to find 日本語 (Japanese) and click Next.
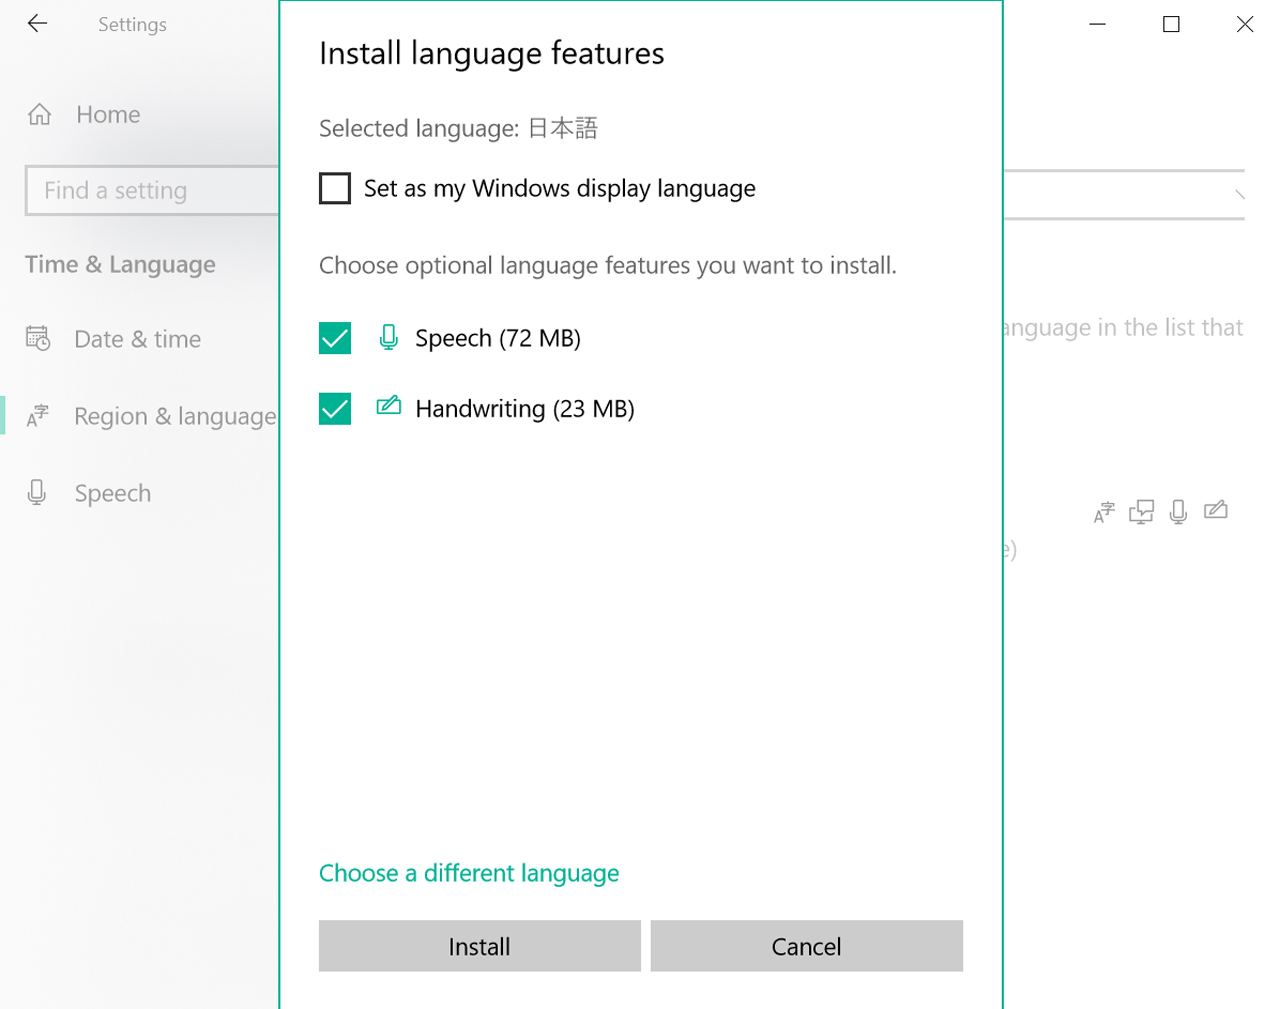
Next you'll have a couple of options. Chances are you'll want to unselect the box that says Set as my Windows display language (unless you are looking for some total immersion!). You can also choose to install speech and handwriting tools as well. Once you've made your selections, click Install.
Once the installation is complete, you'll see Language pack installed in the 日本語 box. That's it! You're ready to type away in Japanese.
Windows 10 Shortcuts
There are shortcuts for switching between language keyboards already on your PC! To switch between the two, here's what you do:
Windows button + spacebar
This will cycle between the two languages.
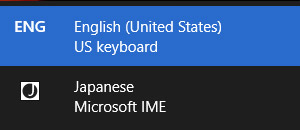
You'll also be able to see what mode you're in at the bottom of the screen in your toolbar.
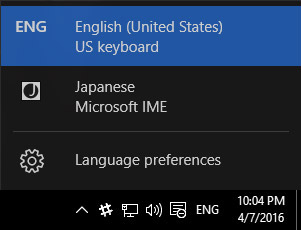
And you can choose your input method by right-clicking on the A or the あ.
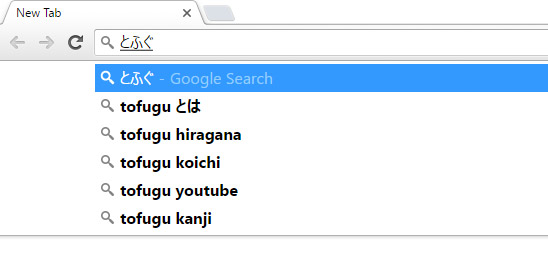
Now you can type in Japanese like this:
Windows 10 IME Pad
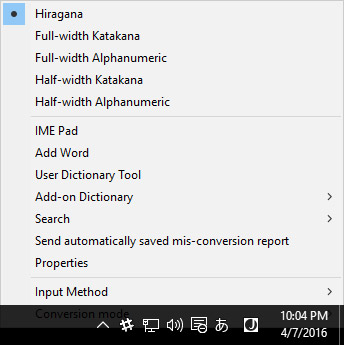
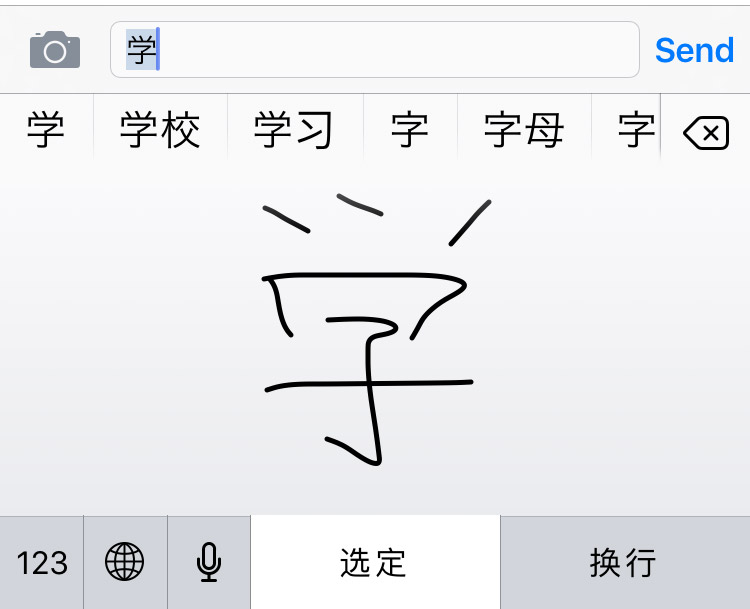
As an added bonus, when you use Windows you get this neat little option called IME Pad.
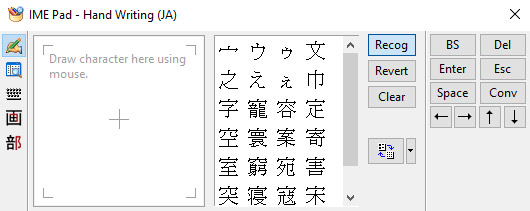
You can use it to draw a kanji character you don't remember the reading for, or to look up a kanji you don't know. The stroke order kind of matters, but the quality of your drawing doesn't so much, as you can see here:
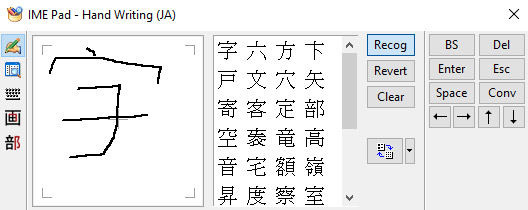
There are also tabs that let you look up kanji by radical.

Or the number of strokes.
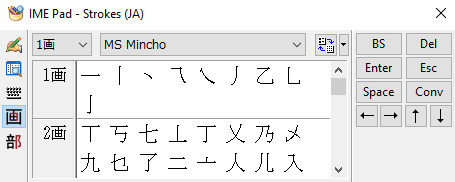
Very useful for language learners!
How to Install Japanese Keyboards on your Phone or Tablet
It's the future and installing a Japanese keyboard is easy-peasy! Well, mostly. But once you learn how to do it, you'll have opened a whole new world of fun.
iOS
Installing Japanese keyboards on your iPhone or iPad is a breeze. These instructions will (or should) work for all current iOS devices.
If you've installed the emoji keyboard, then this should be very familiar. If you haven't, then follow these instructions but switch out Japanese for Emoji, and you can thank me later.
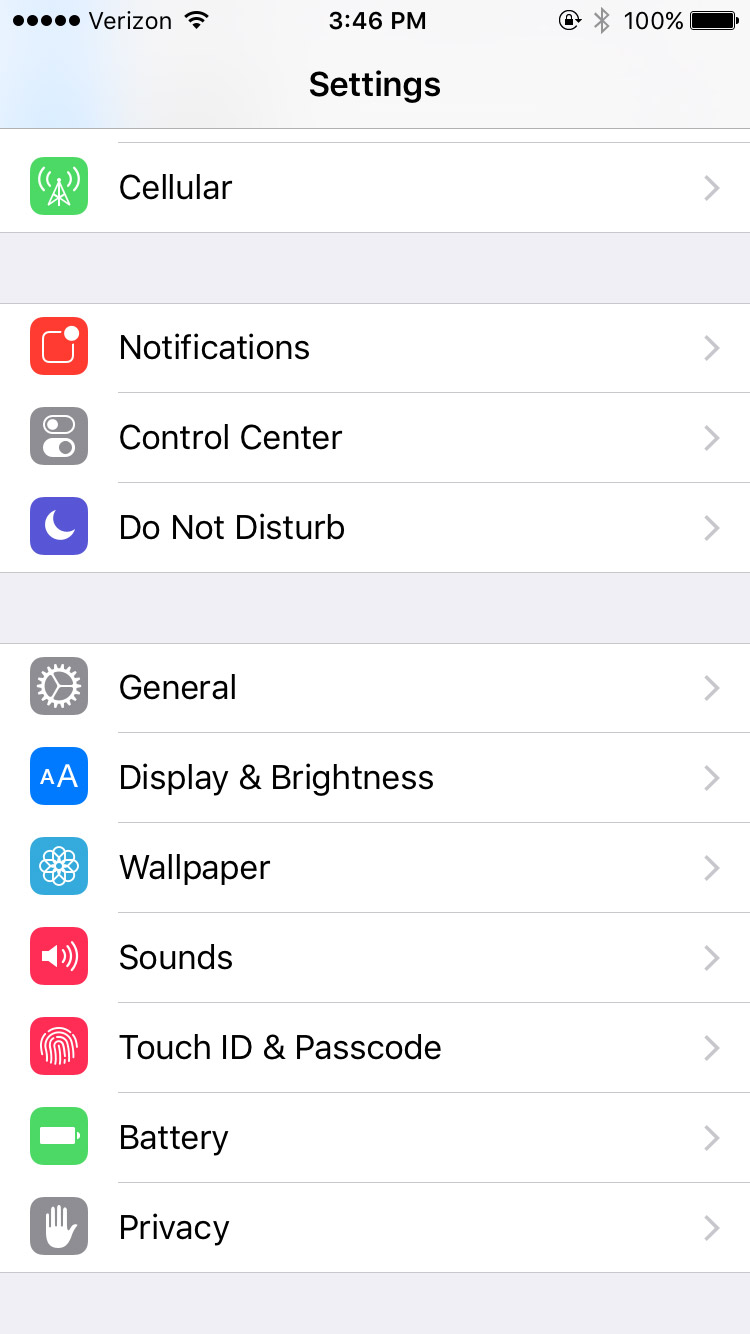
First, go to your Settings and click on General.
Then Keyboard.
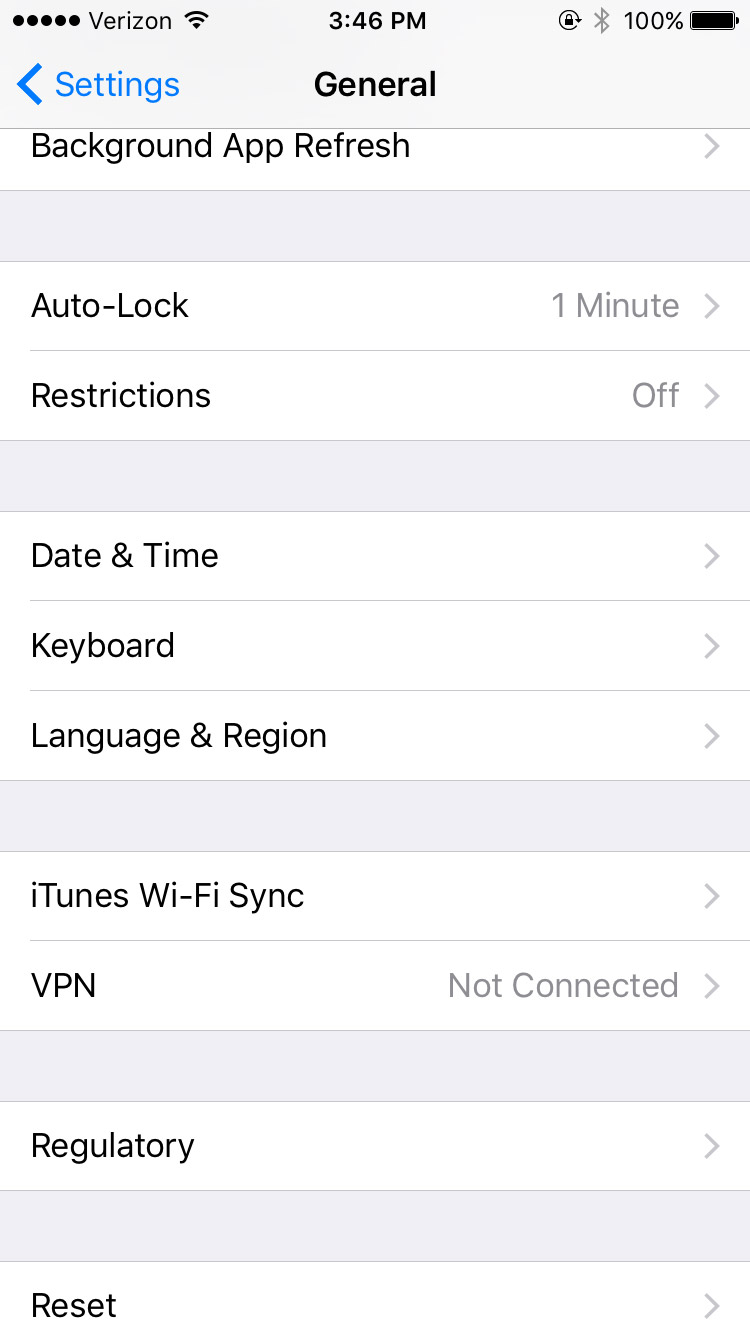
And then Keyboards with an s.
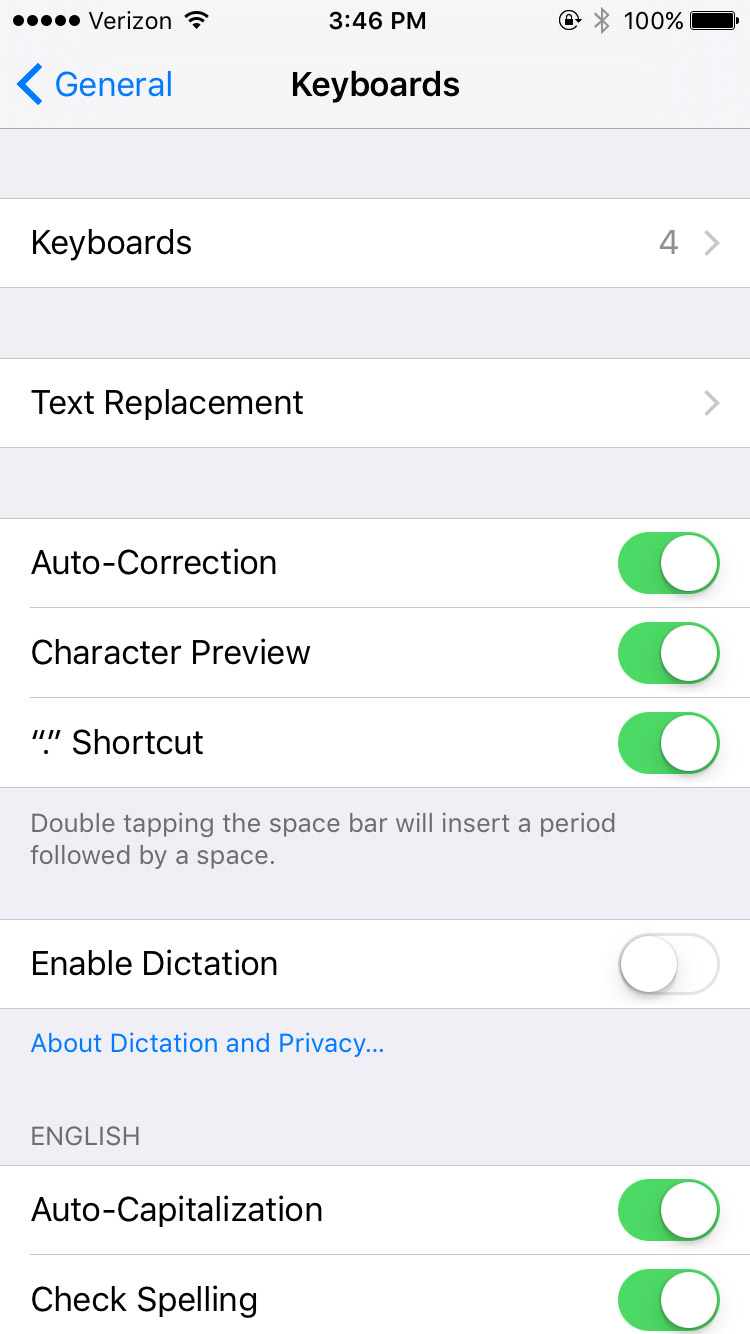
You'll see a list of the keyboards you already have installed.
Click on Add New Keyboard.
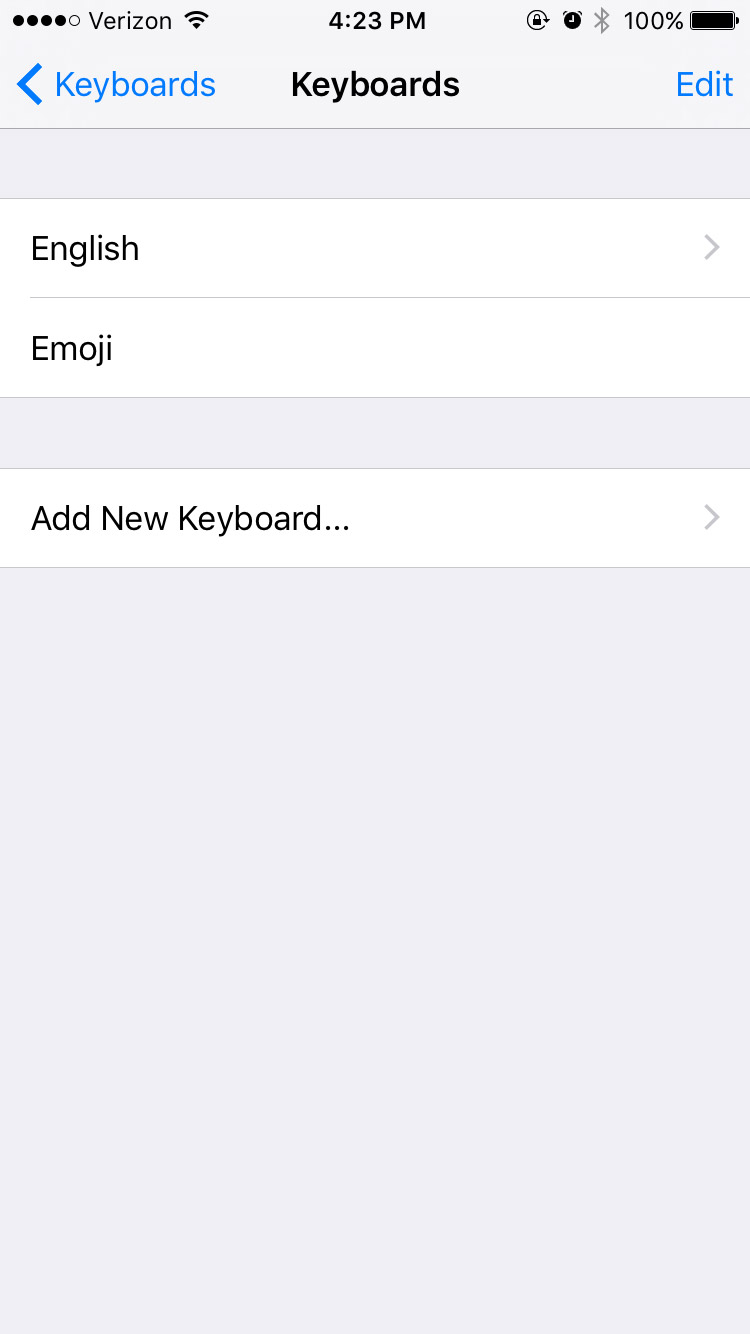
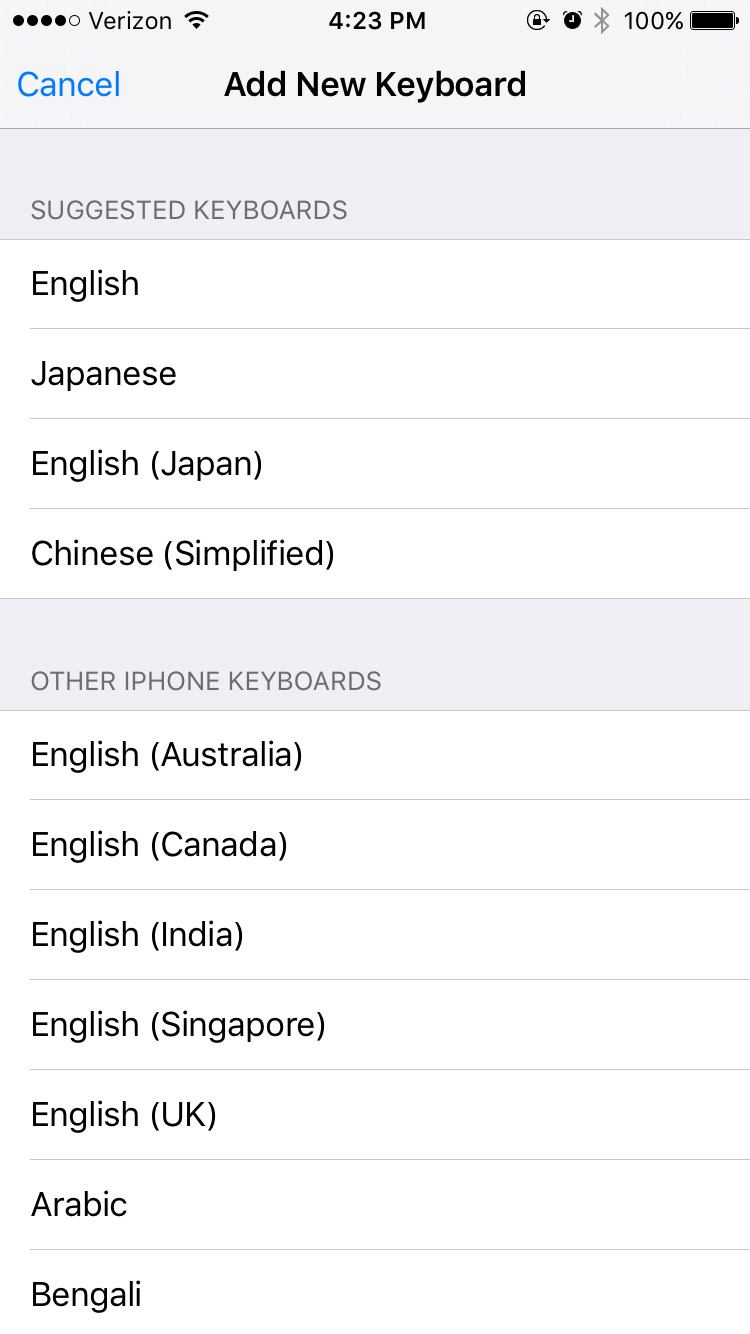
Scroll down to Japanese. (Mine is suggested because I've used it before.)
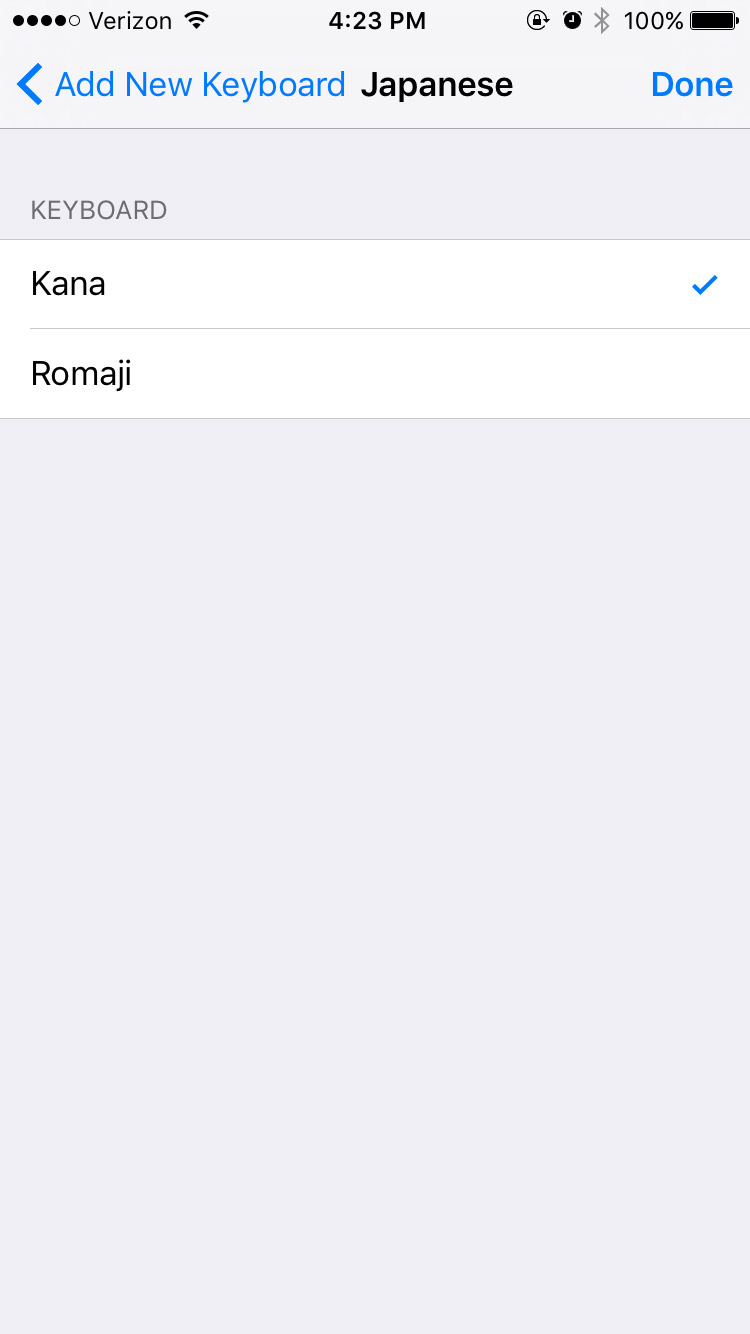
Now choose Kana and/or Romaji and Done at the top right.
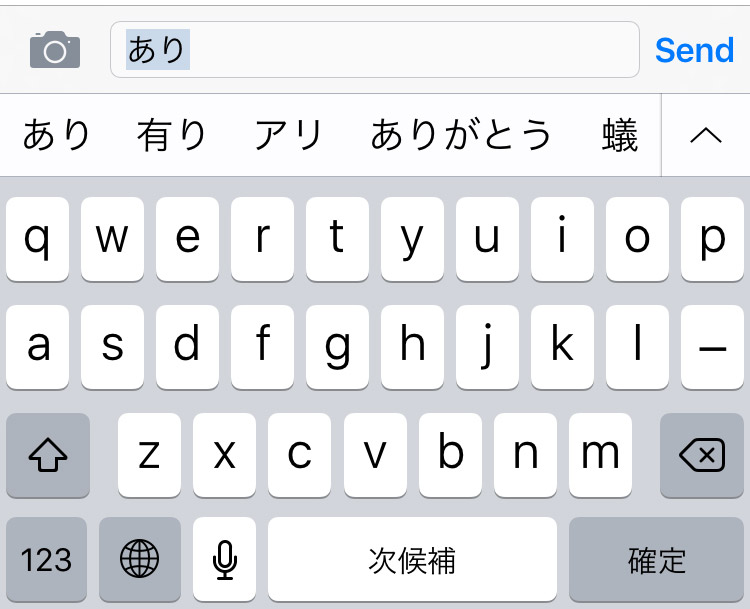
That's it! To use it go to your messages and start as you normally would. But now you'll see that there is a new symbol, this little globe circle.
It will switch to the next (or whatever it thinks you want) keyboard, which should be Japanese!
Some versions of Android/Google IME do not show the globe, but fear not! You can also hold down the space bar to switch between input languages.
The Kana mode looks like this:

And the Romaji mode looks like this:
iOS Chinese Secrets
Want to quickly look up kanji on your phone without using an outdated app, waiting for your browser, or having to pay for a drawing tool? We've got a hack for you!
Follow all those iOS keyboard instructions above, but stop after you hit the Add New Keyboard step.
Instead, scroll down until you reach Chinese (Simplified). Then under the keyboard choices choose Handwriting.
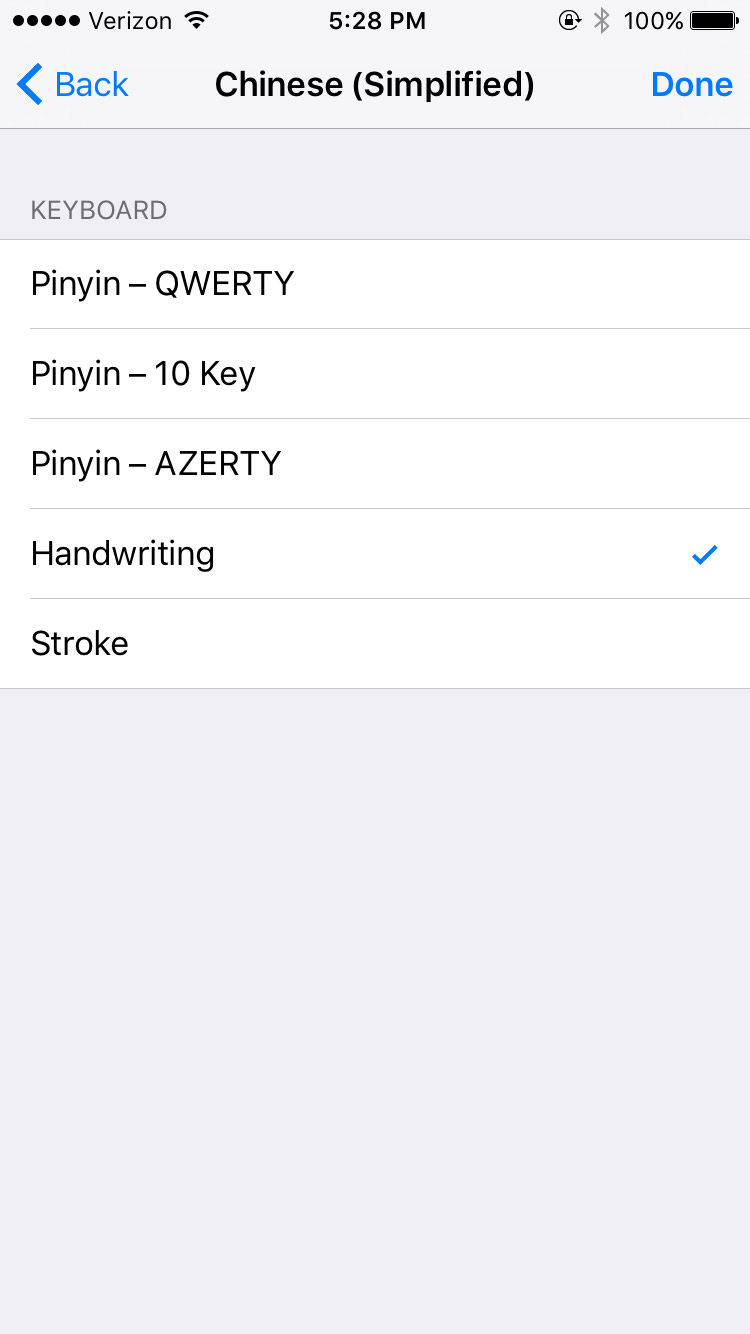
Now you have a new keyboard option that opens up a drawing IME. It may be for Chinese, but remember a ton of Japanese and Chinese characters are shared. And it works for both!
This works when you're texting your friends and trying to look up or save a kanji to look up later on. Even better, it doesn't care about stroke order like most Japanese apps. And it doesn't use the same database as most Japanese - English dictionaries (Jim Breen, Jisho.org, Tangorin, etc.). Also you don't need an internet connection to use it! Handy, right?
Android
For non-Apple people, there's only one way to go. Time to look at installing Japanese keyboards on Android. These instructions will (or should) work for all current Android devices.
First, you need to download a Japanese keyboard. To do this open the Play Store.
Then in the search bar type in gboard.
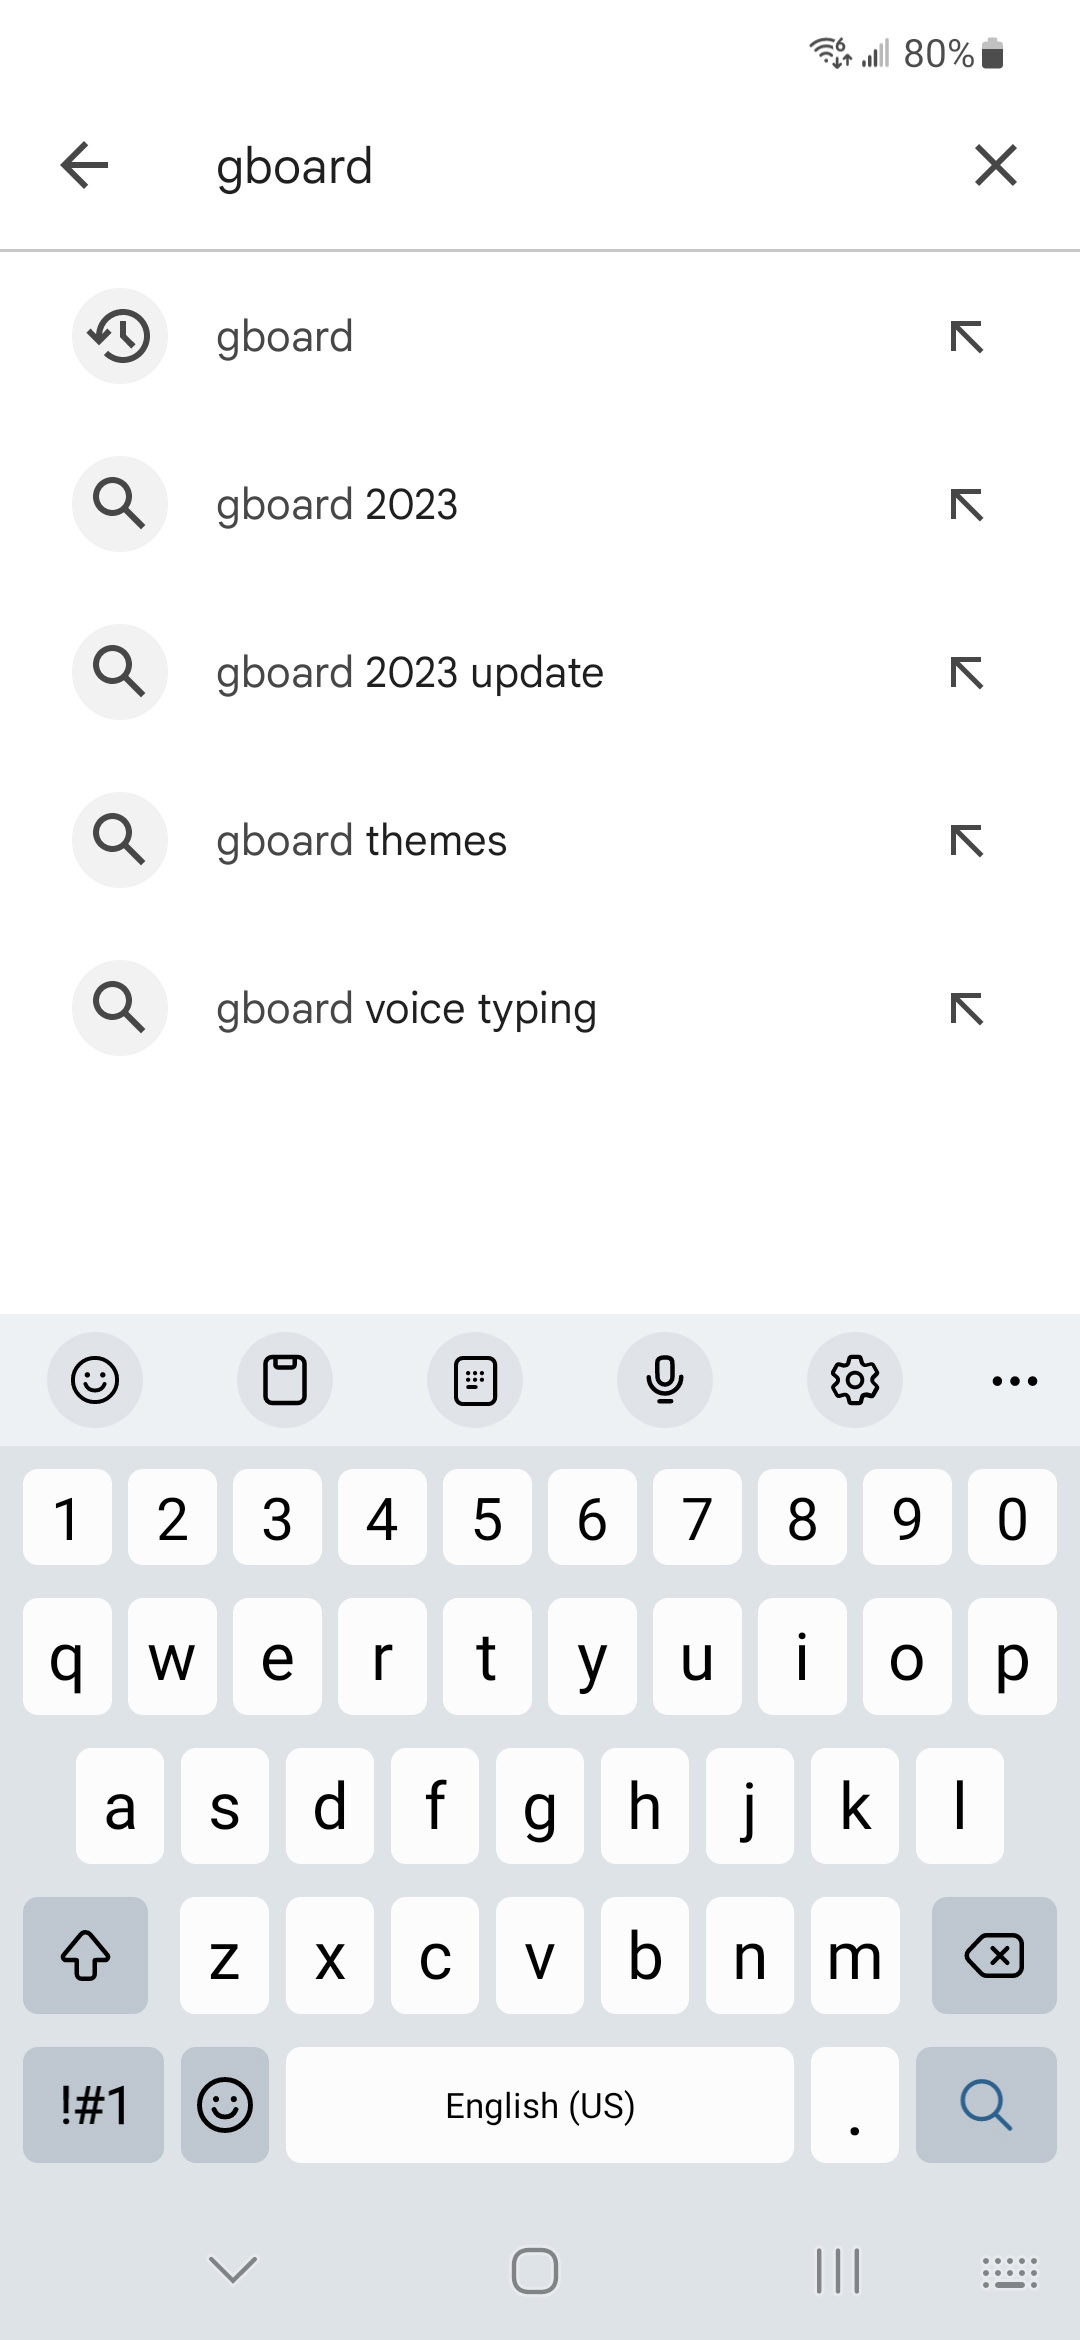
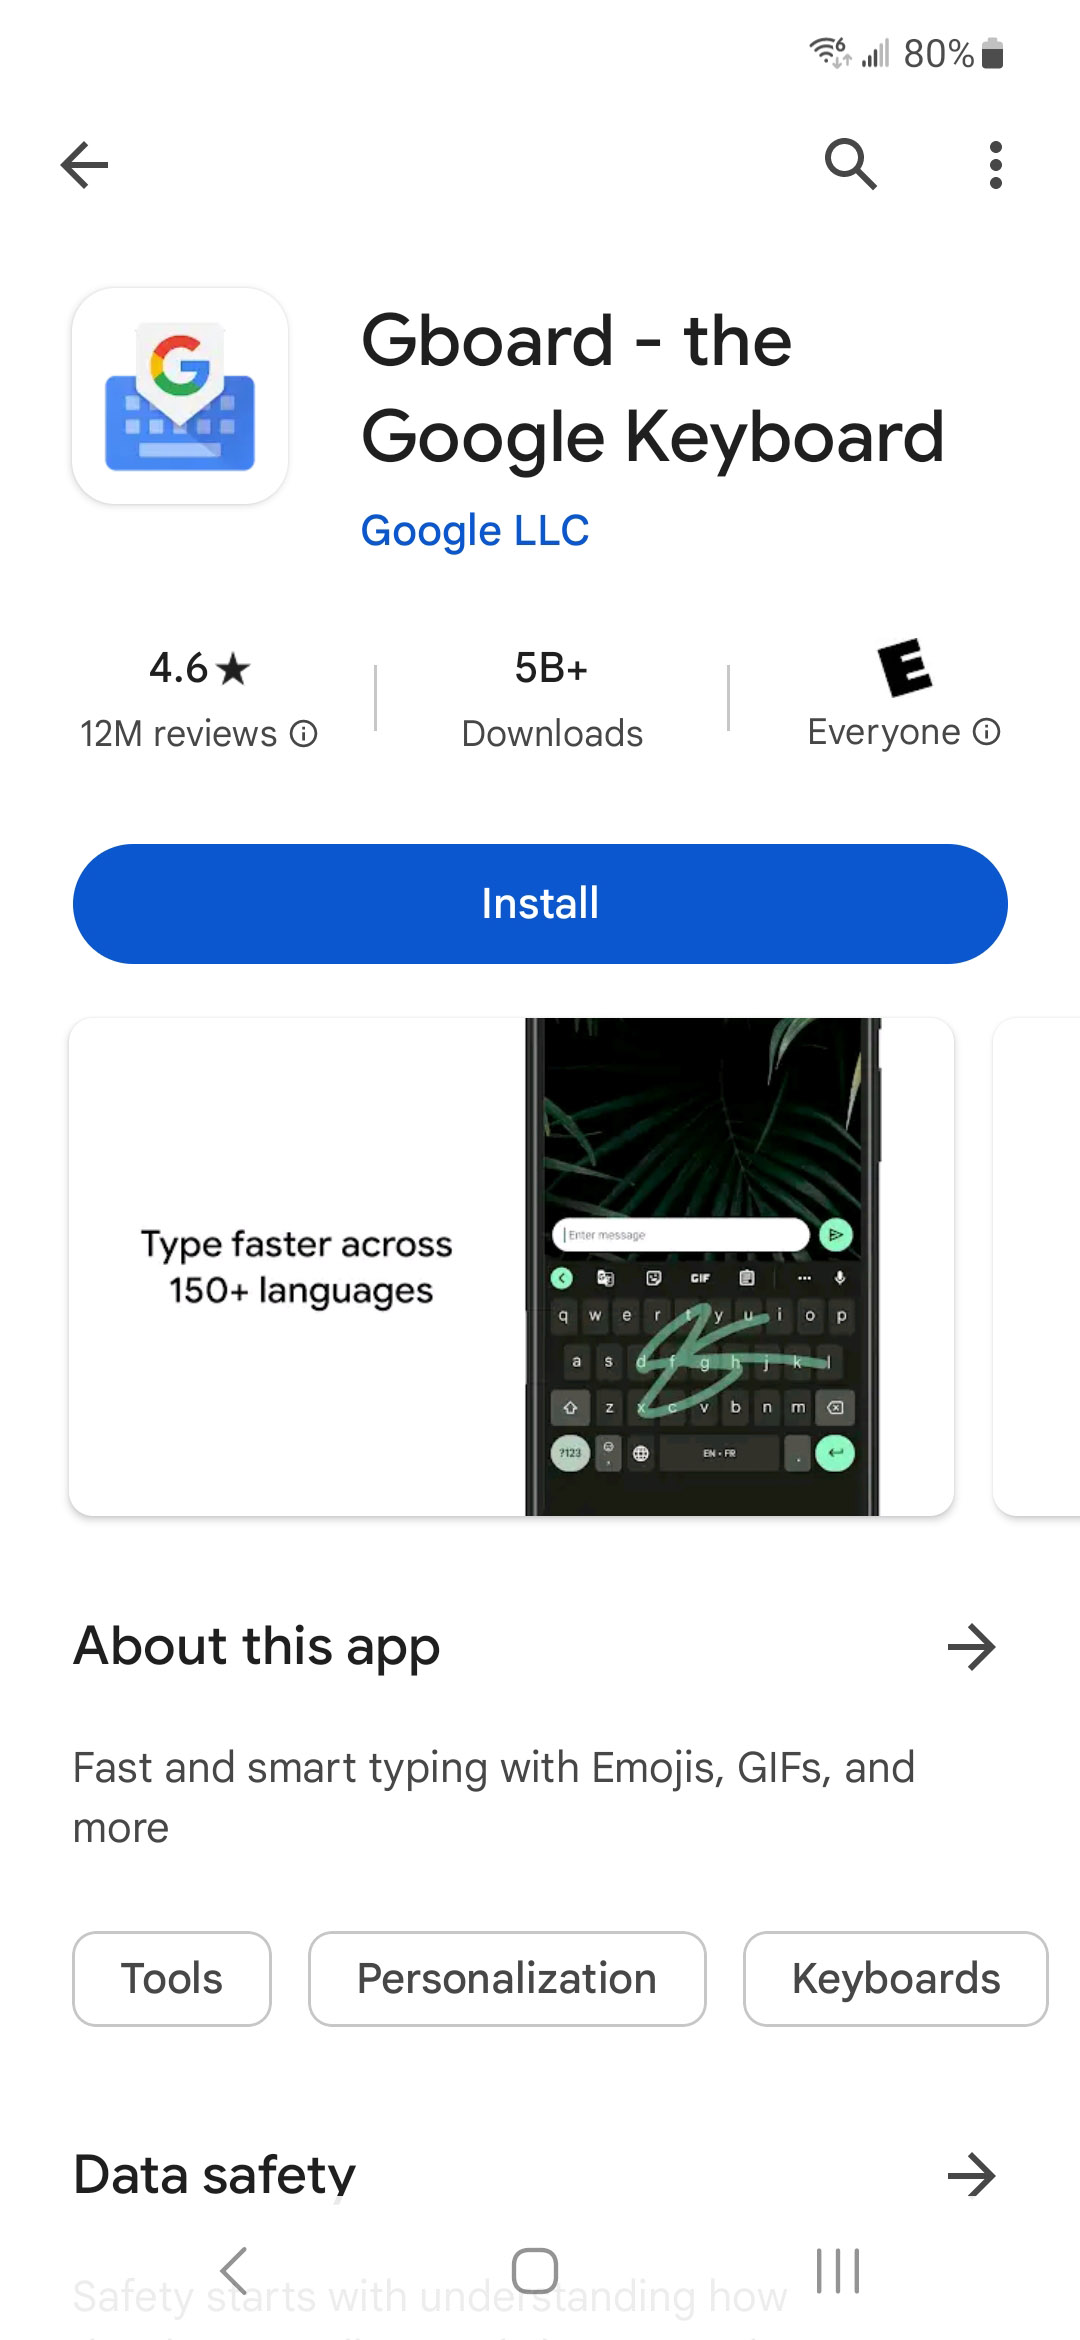
The first non-advertisement option will almost definitely be the Gboard app.

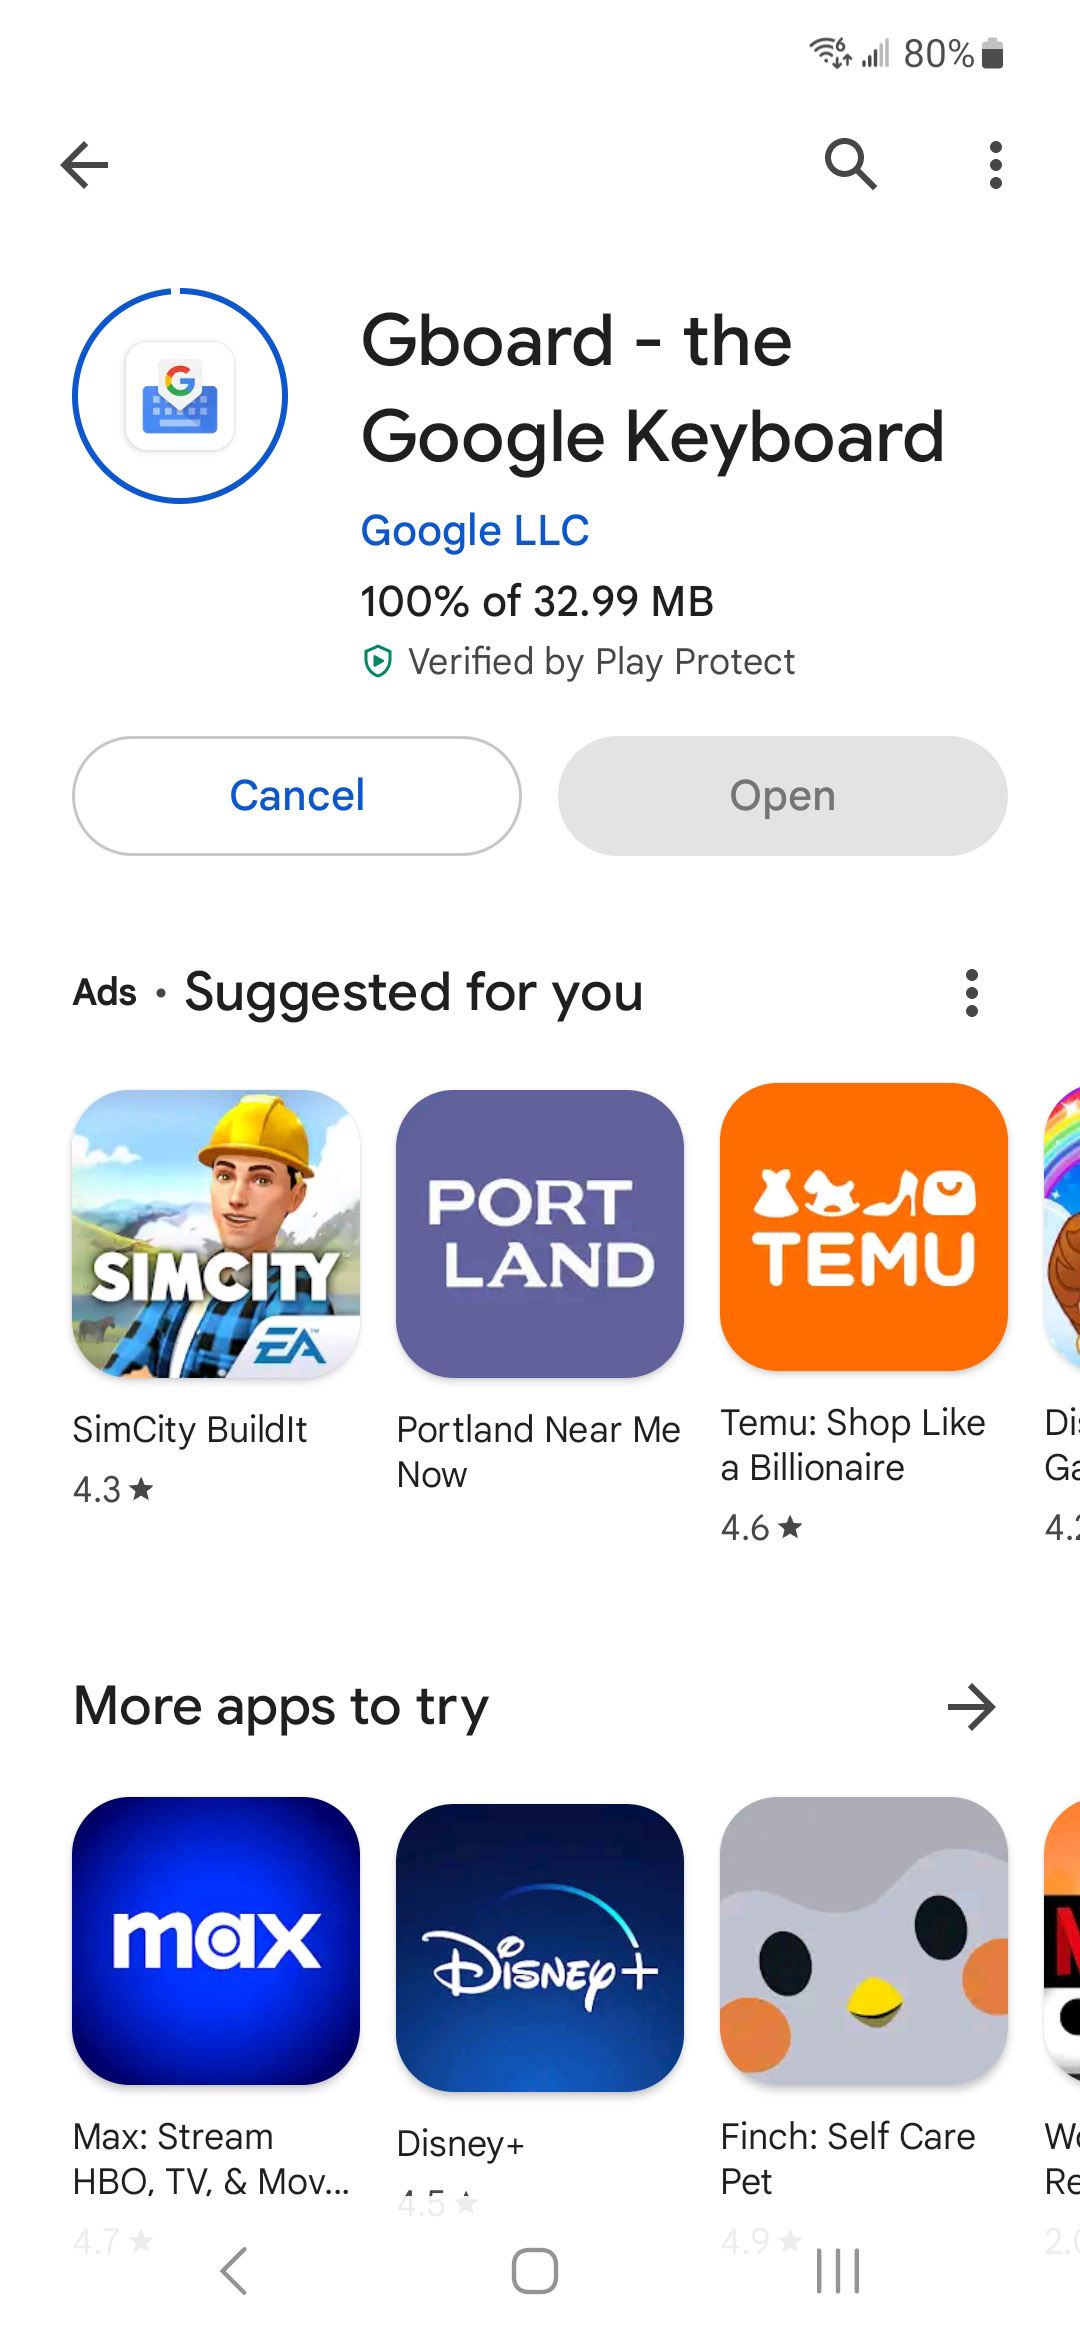
This one is free and easy to use so let's INSTALL.
Give it permission and download that baby.
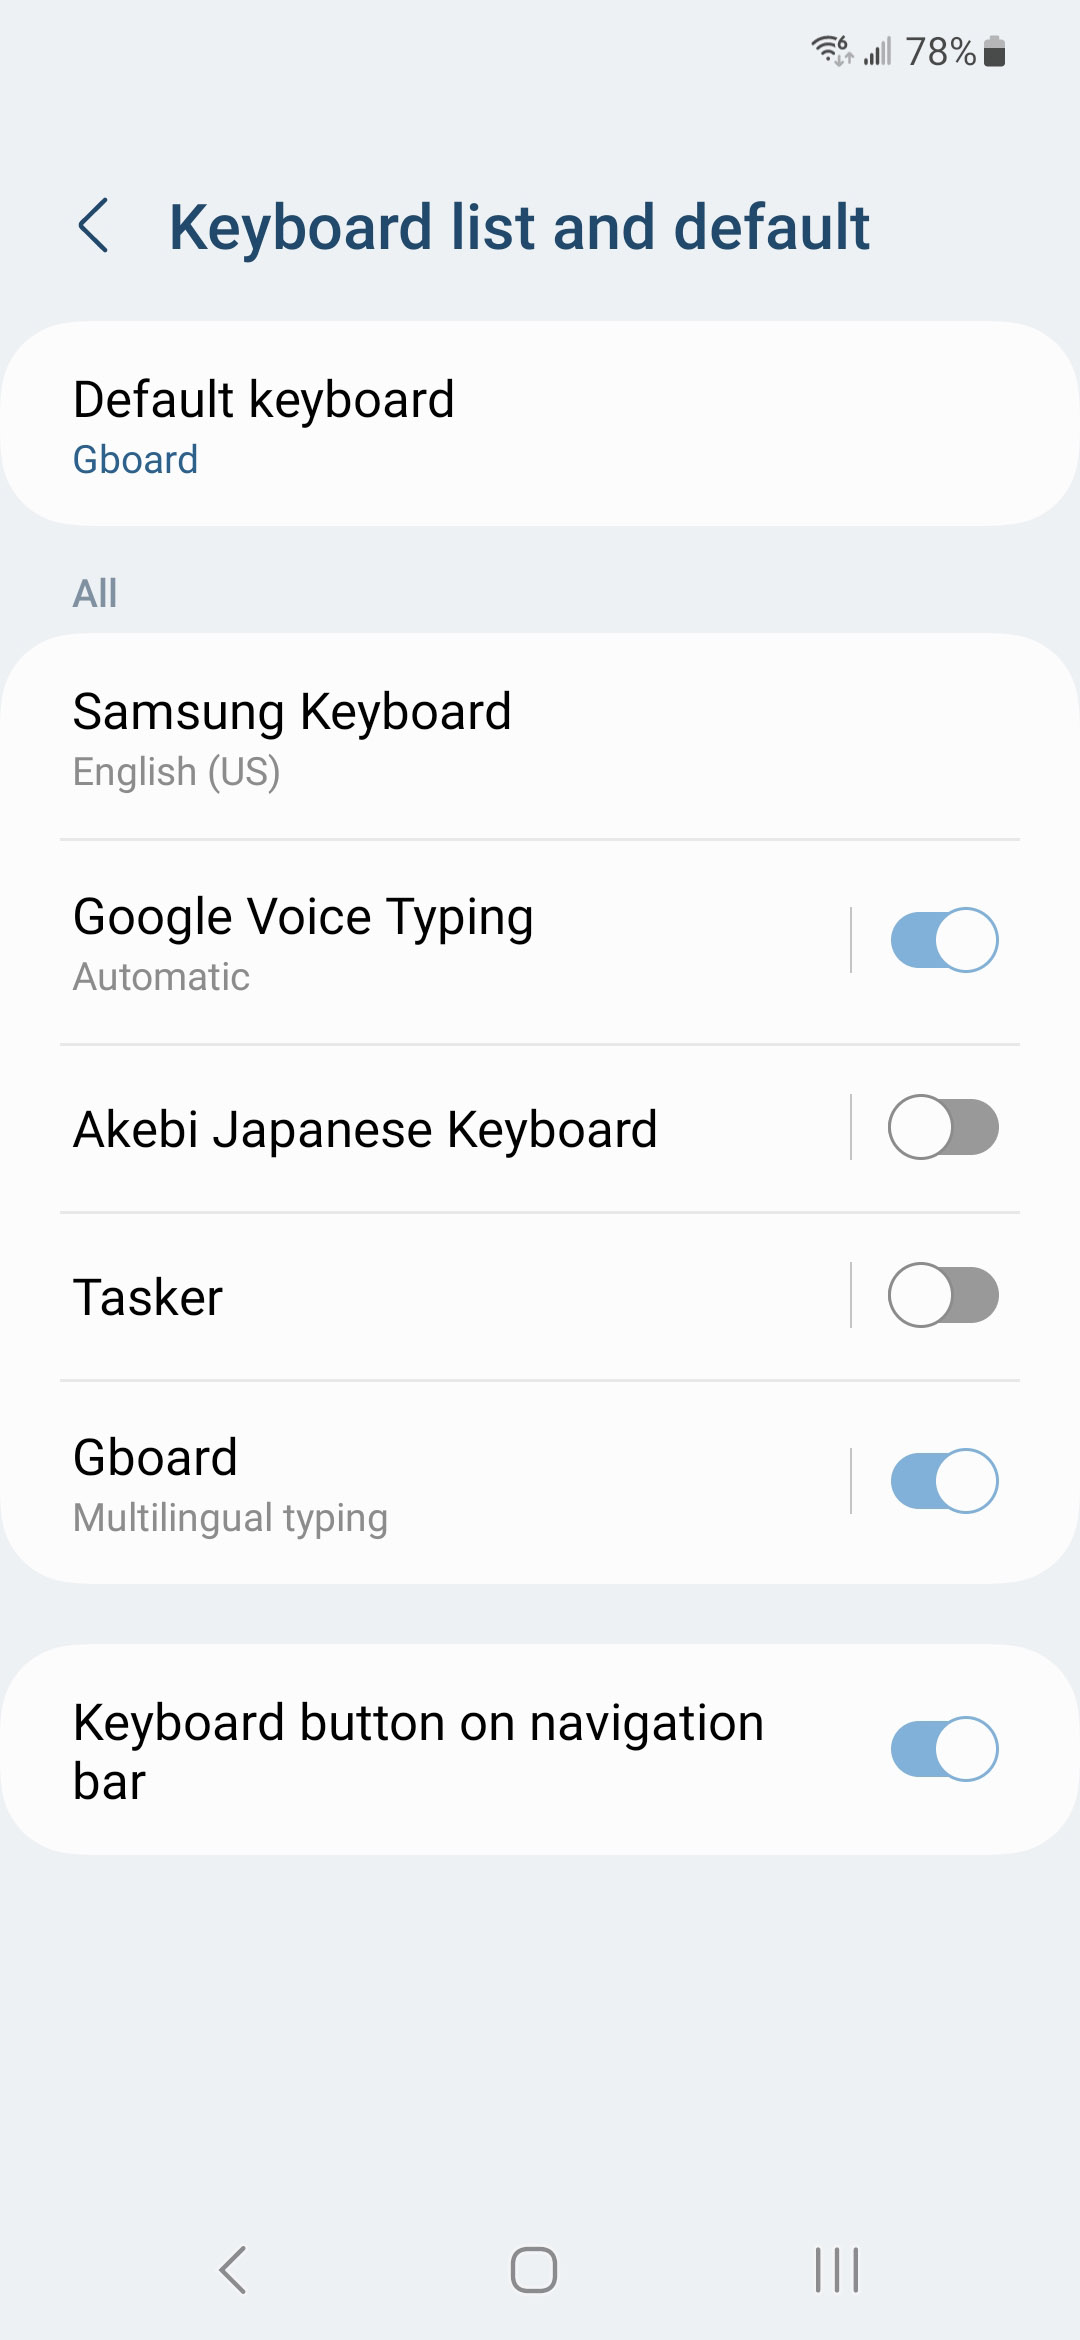
Open it up and tap the button to be brought to your keyboard settings menu.

You should be brought to your phone's Keyboard & Input Method screen. This may look a little different depending on what phone you have. Look for Gboard and turn it on!
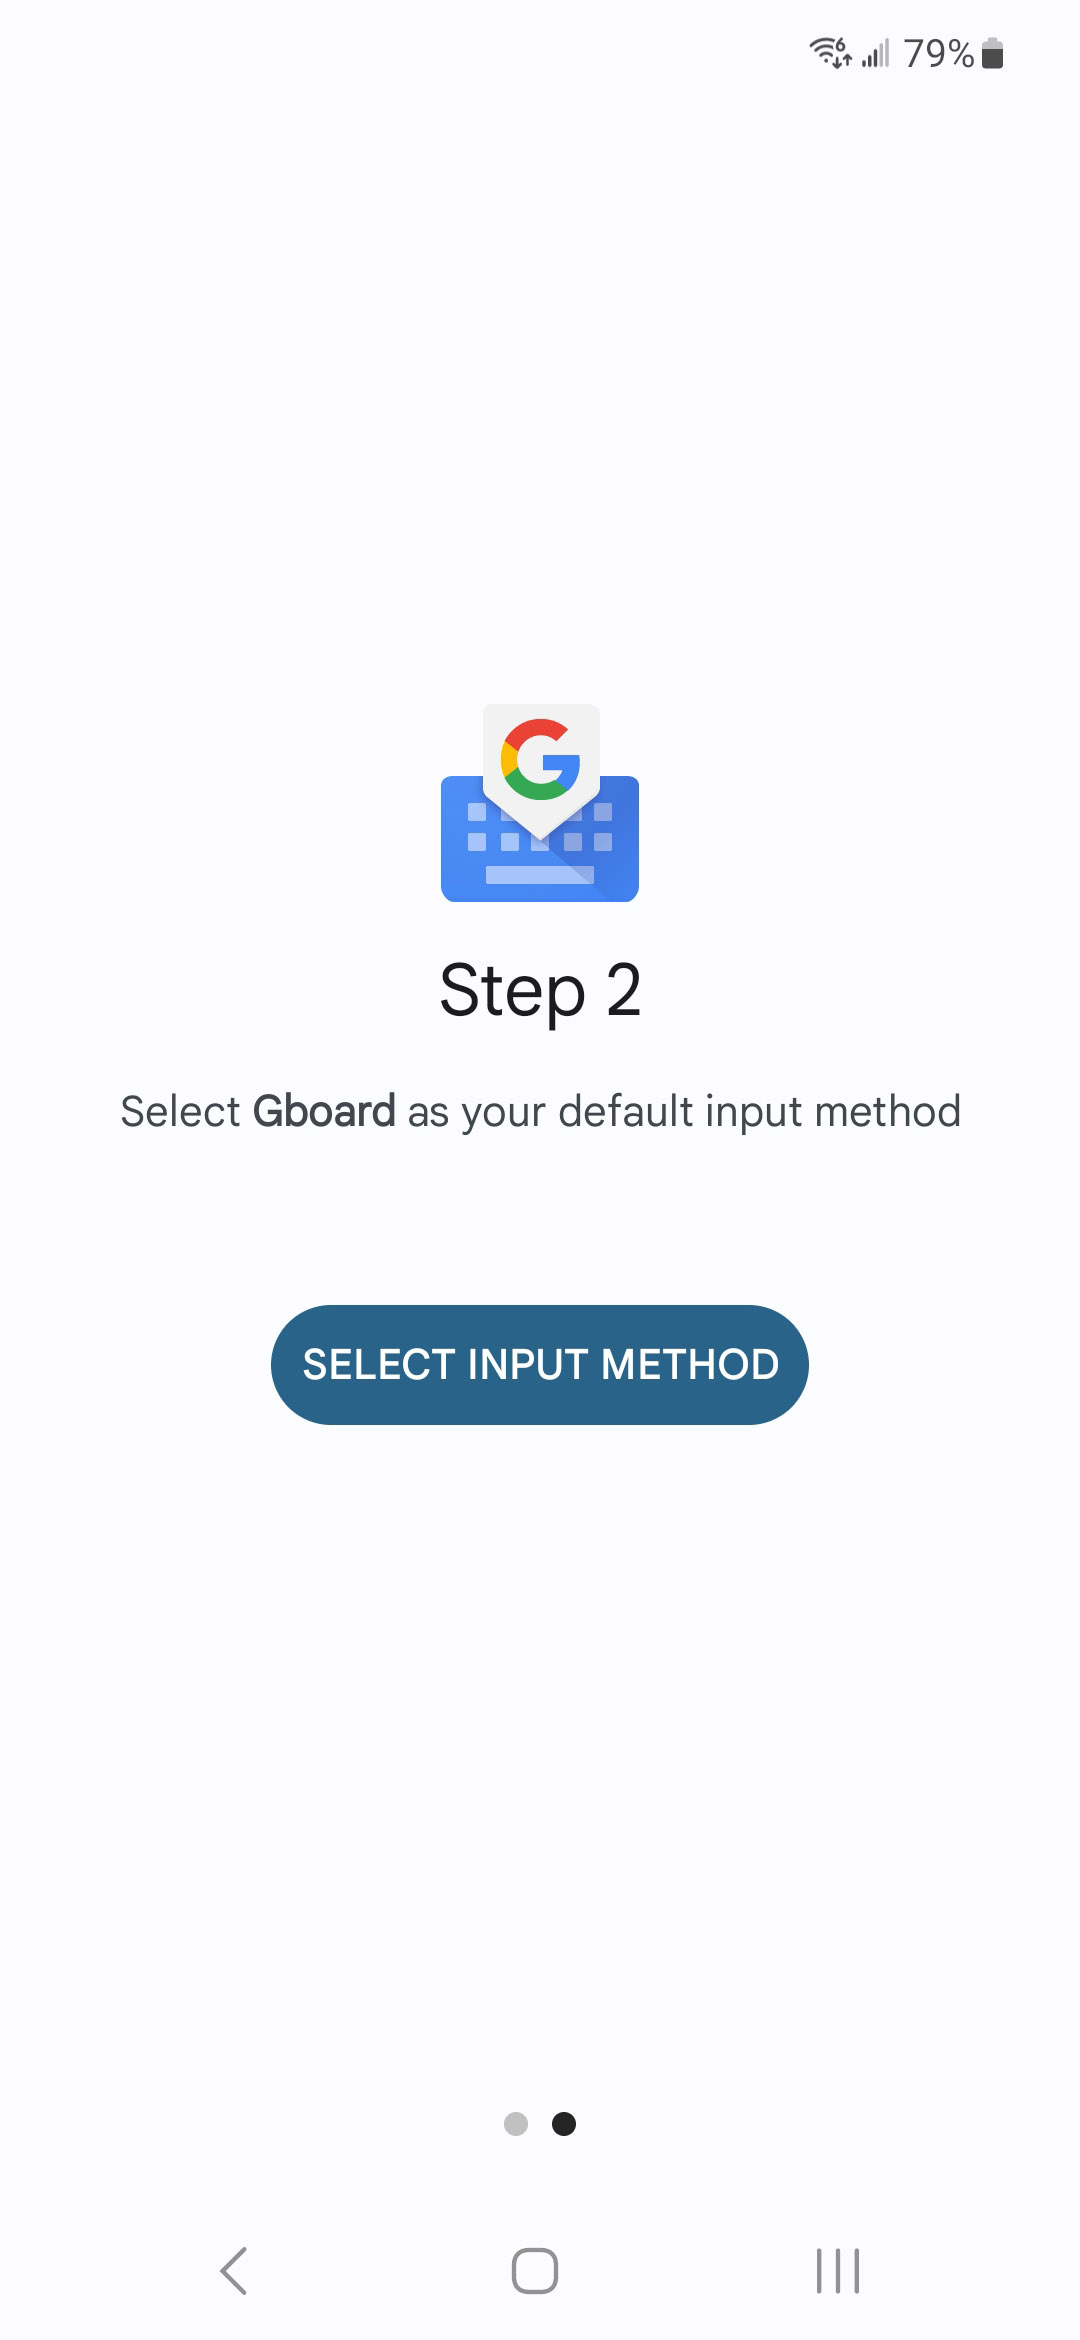
Navigate back to the Gboard app and you should now be on step 2! Tap the Select Input Method button next.
A pop-up menu should appear with Gboard as one of your possible options.
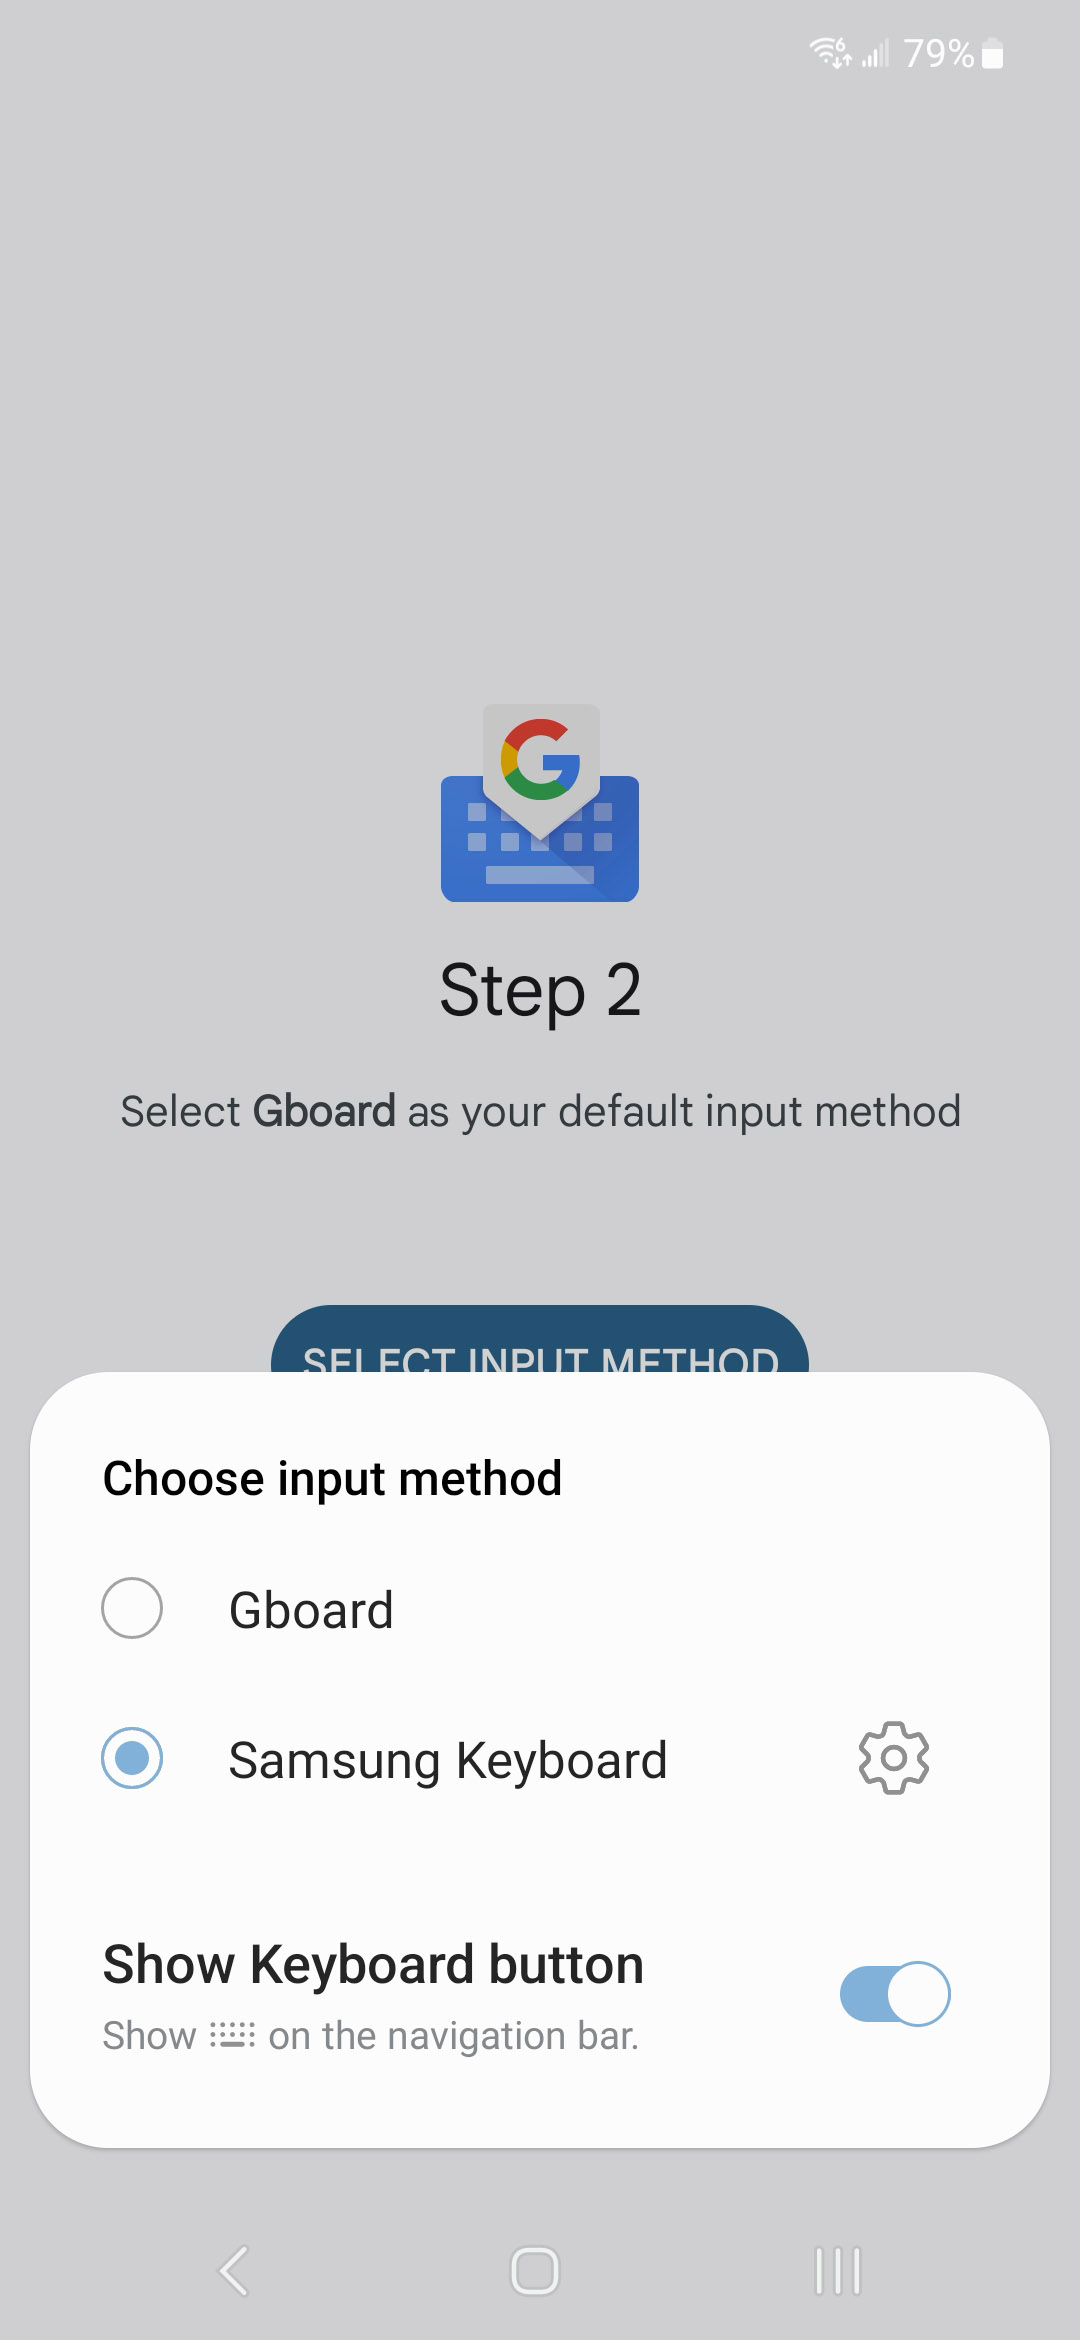
Once you select Gboard, you should be brought to the settings menu for you new Gboard keyboard! Select Languages at the top of the settings menu next.
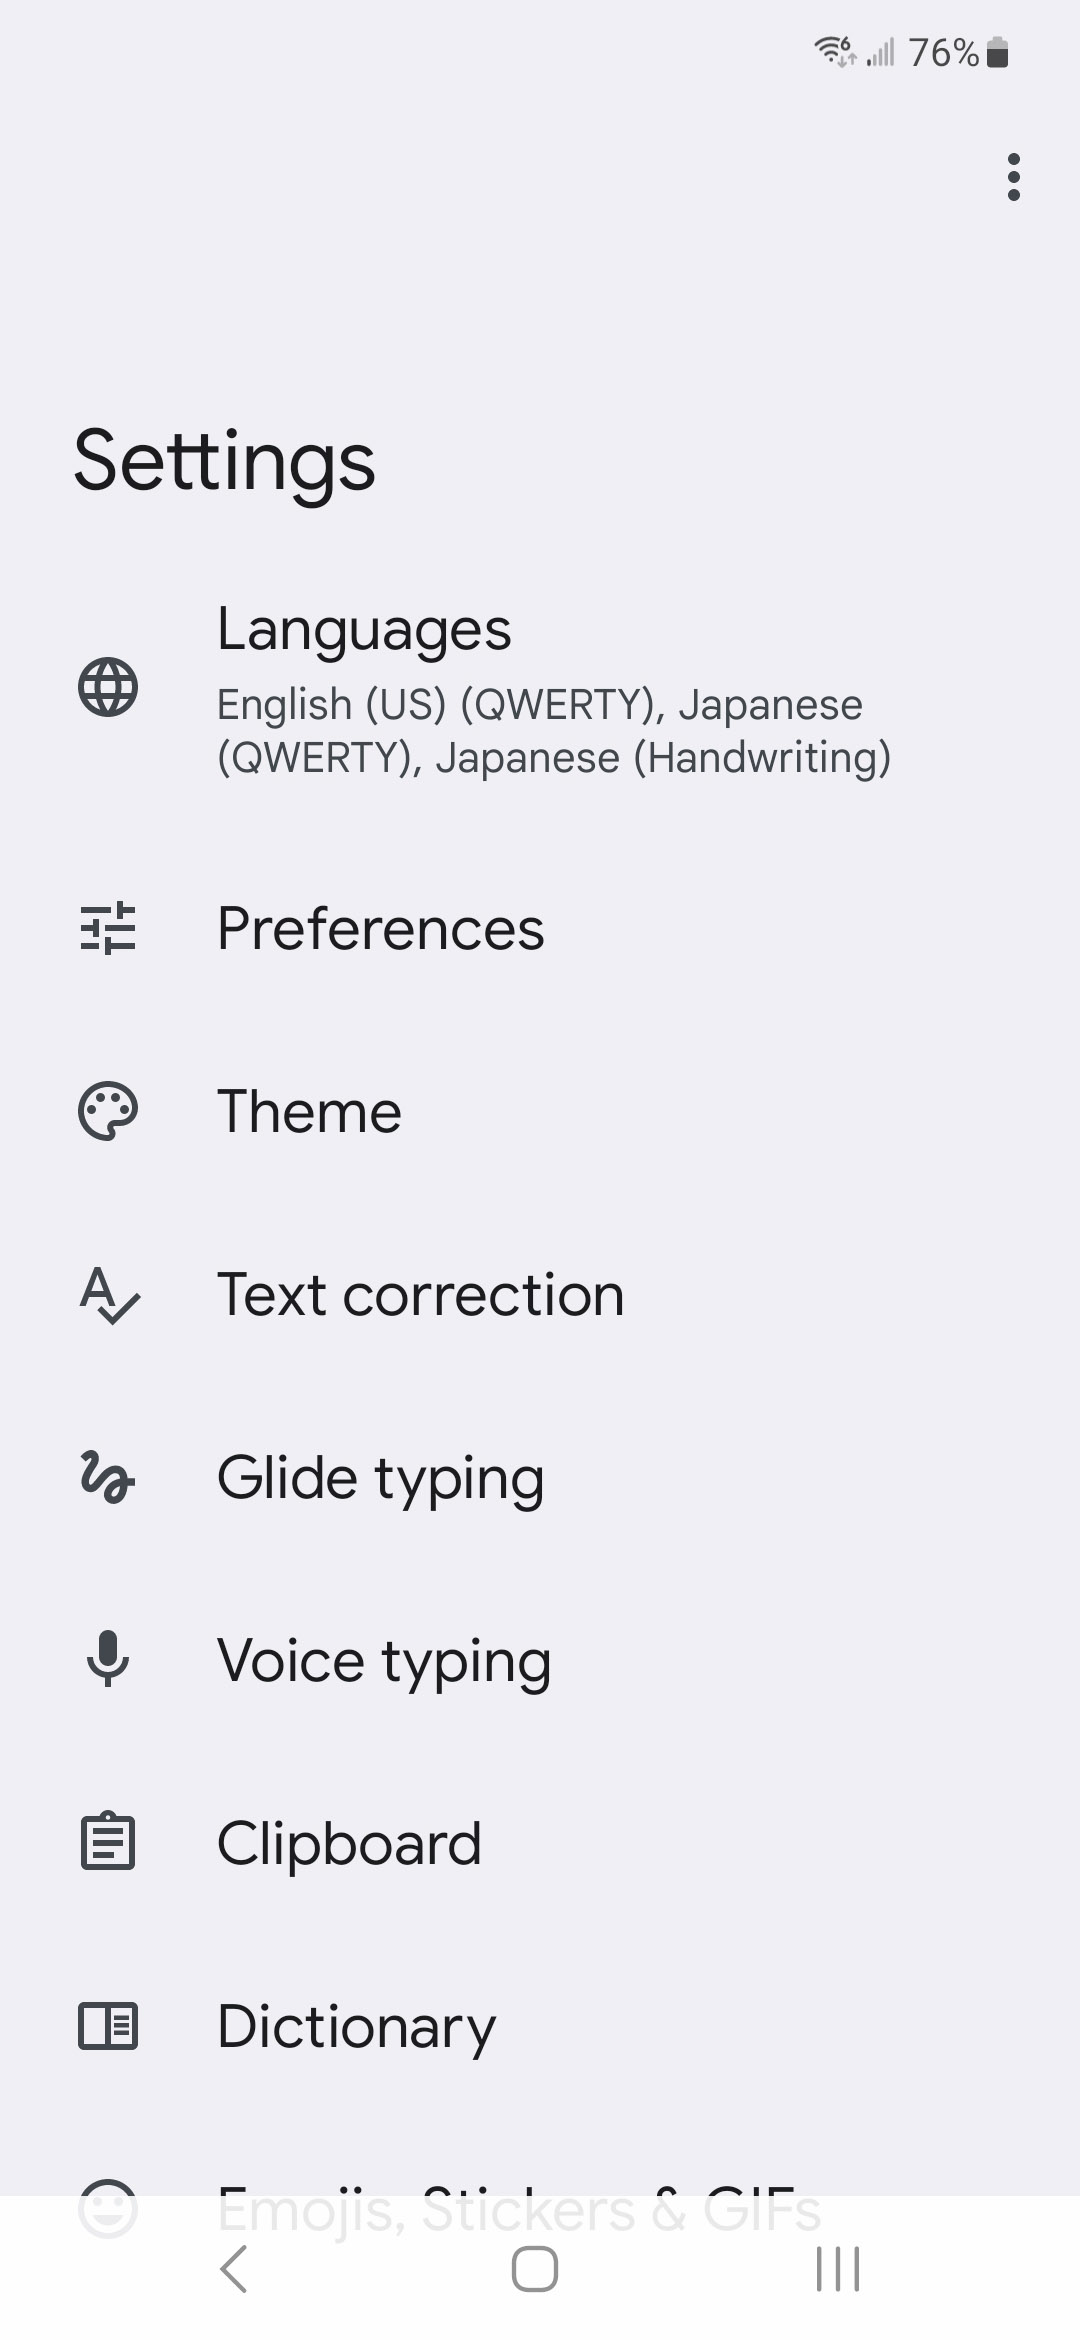
From the languages screen, tap + Add Keyboard.
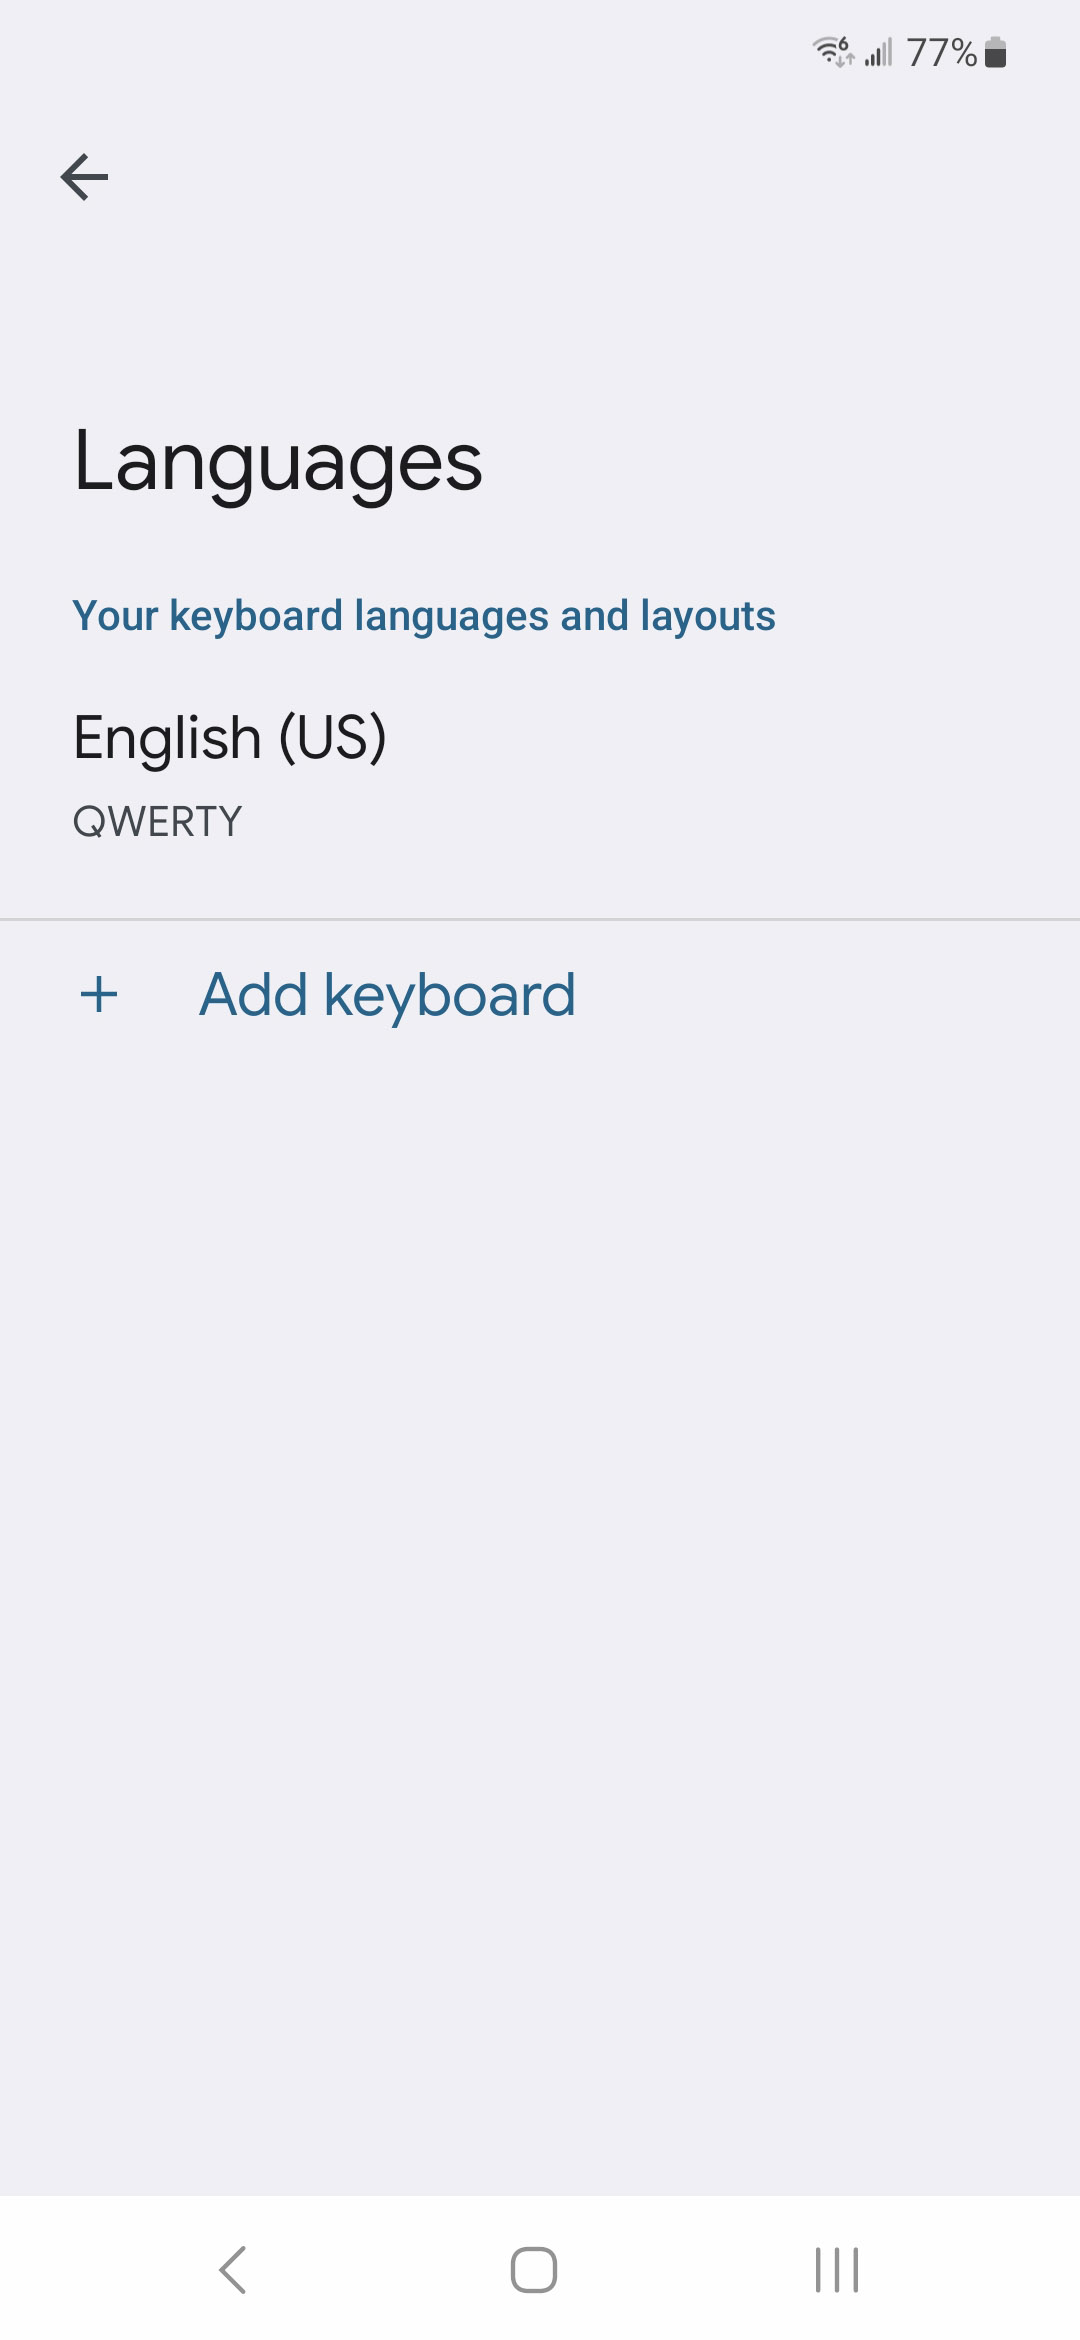
Next, search for Japanese and select it.
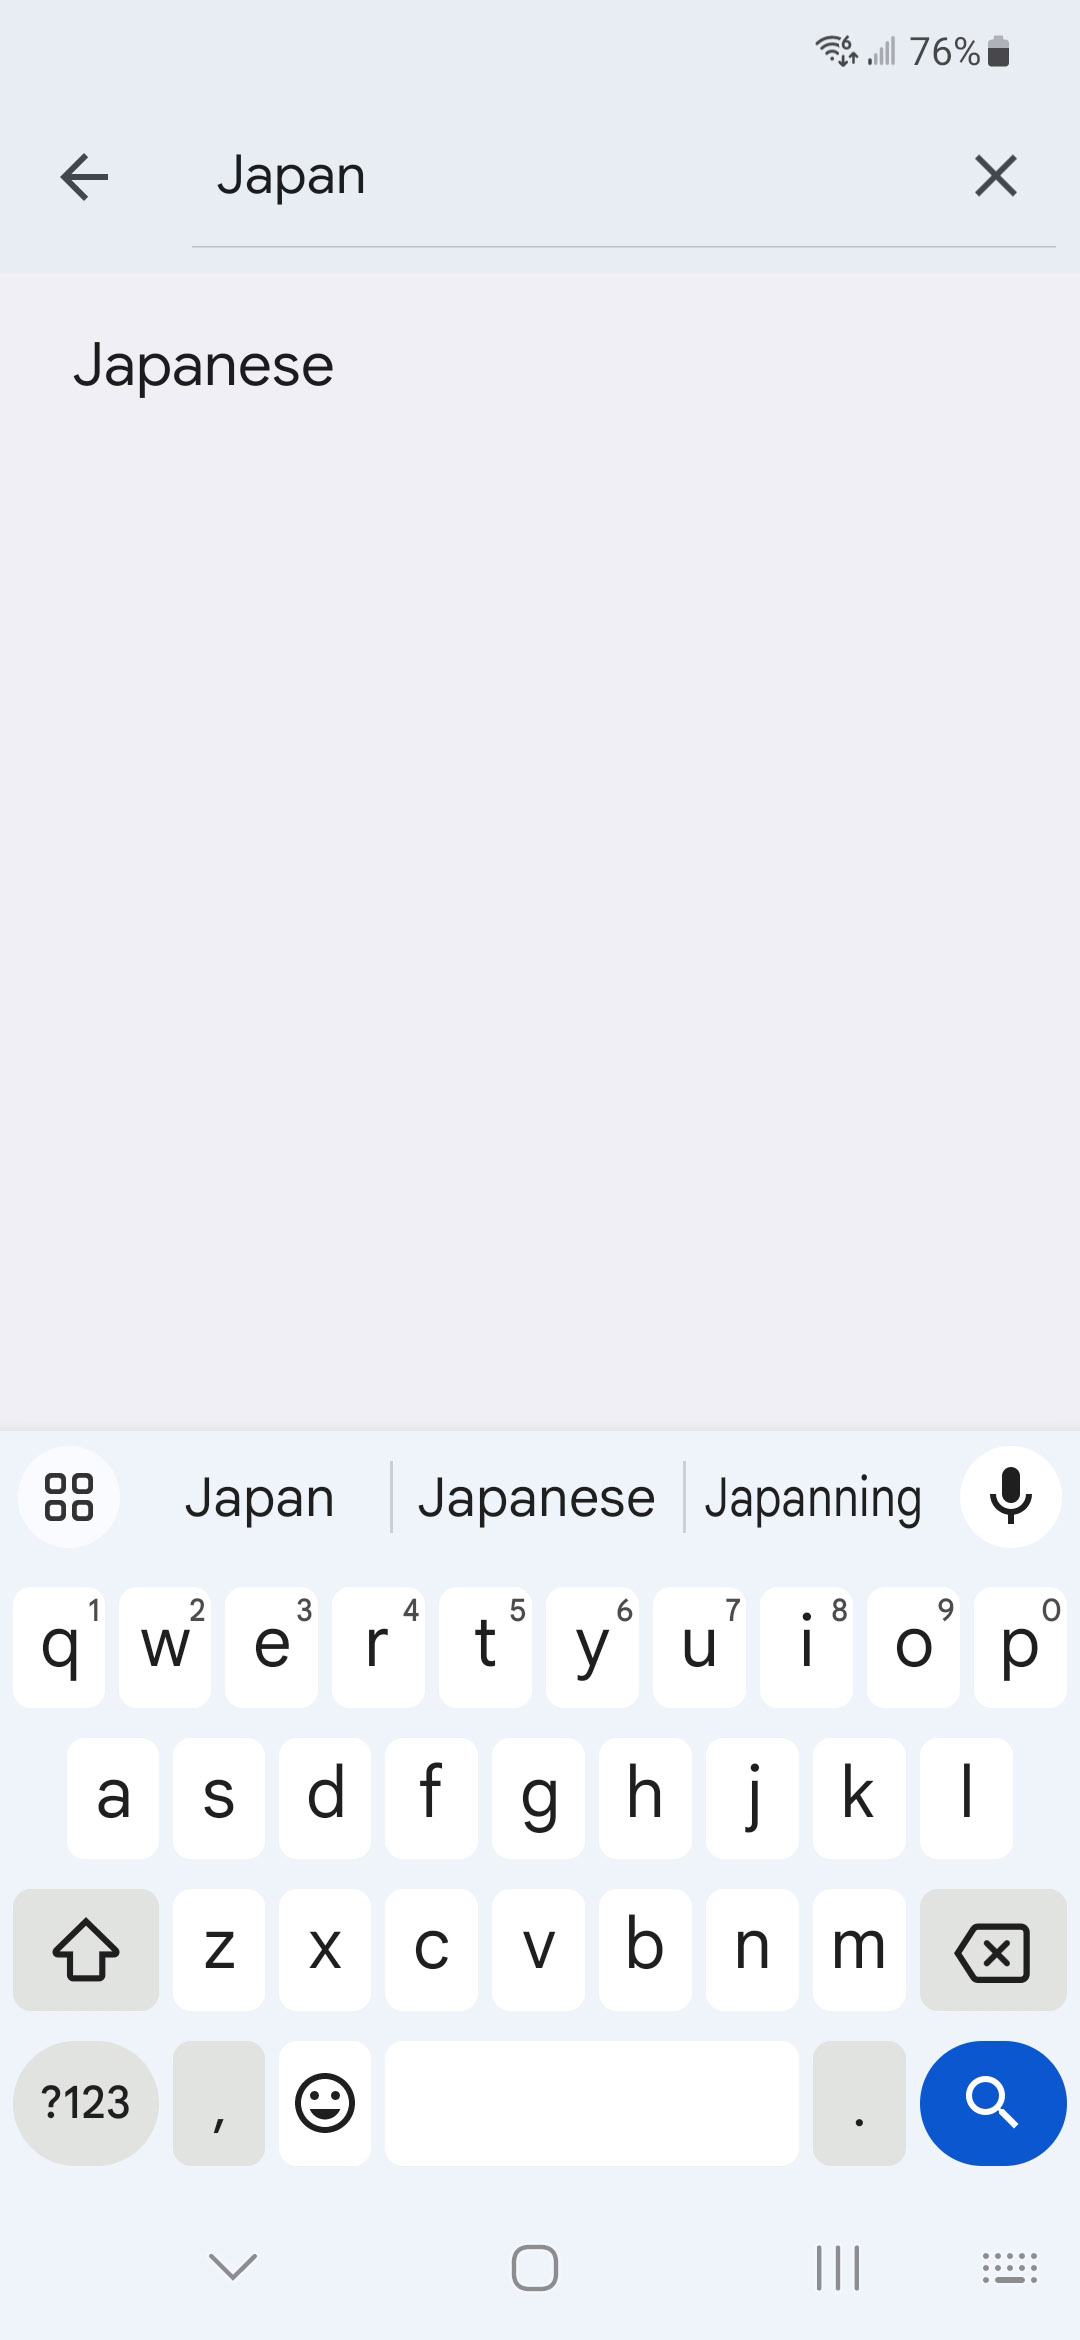
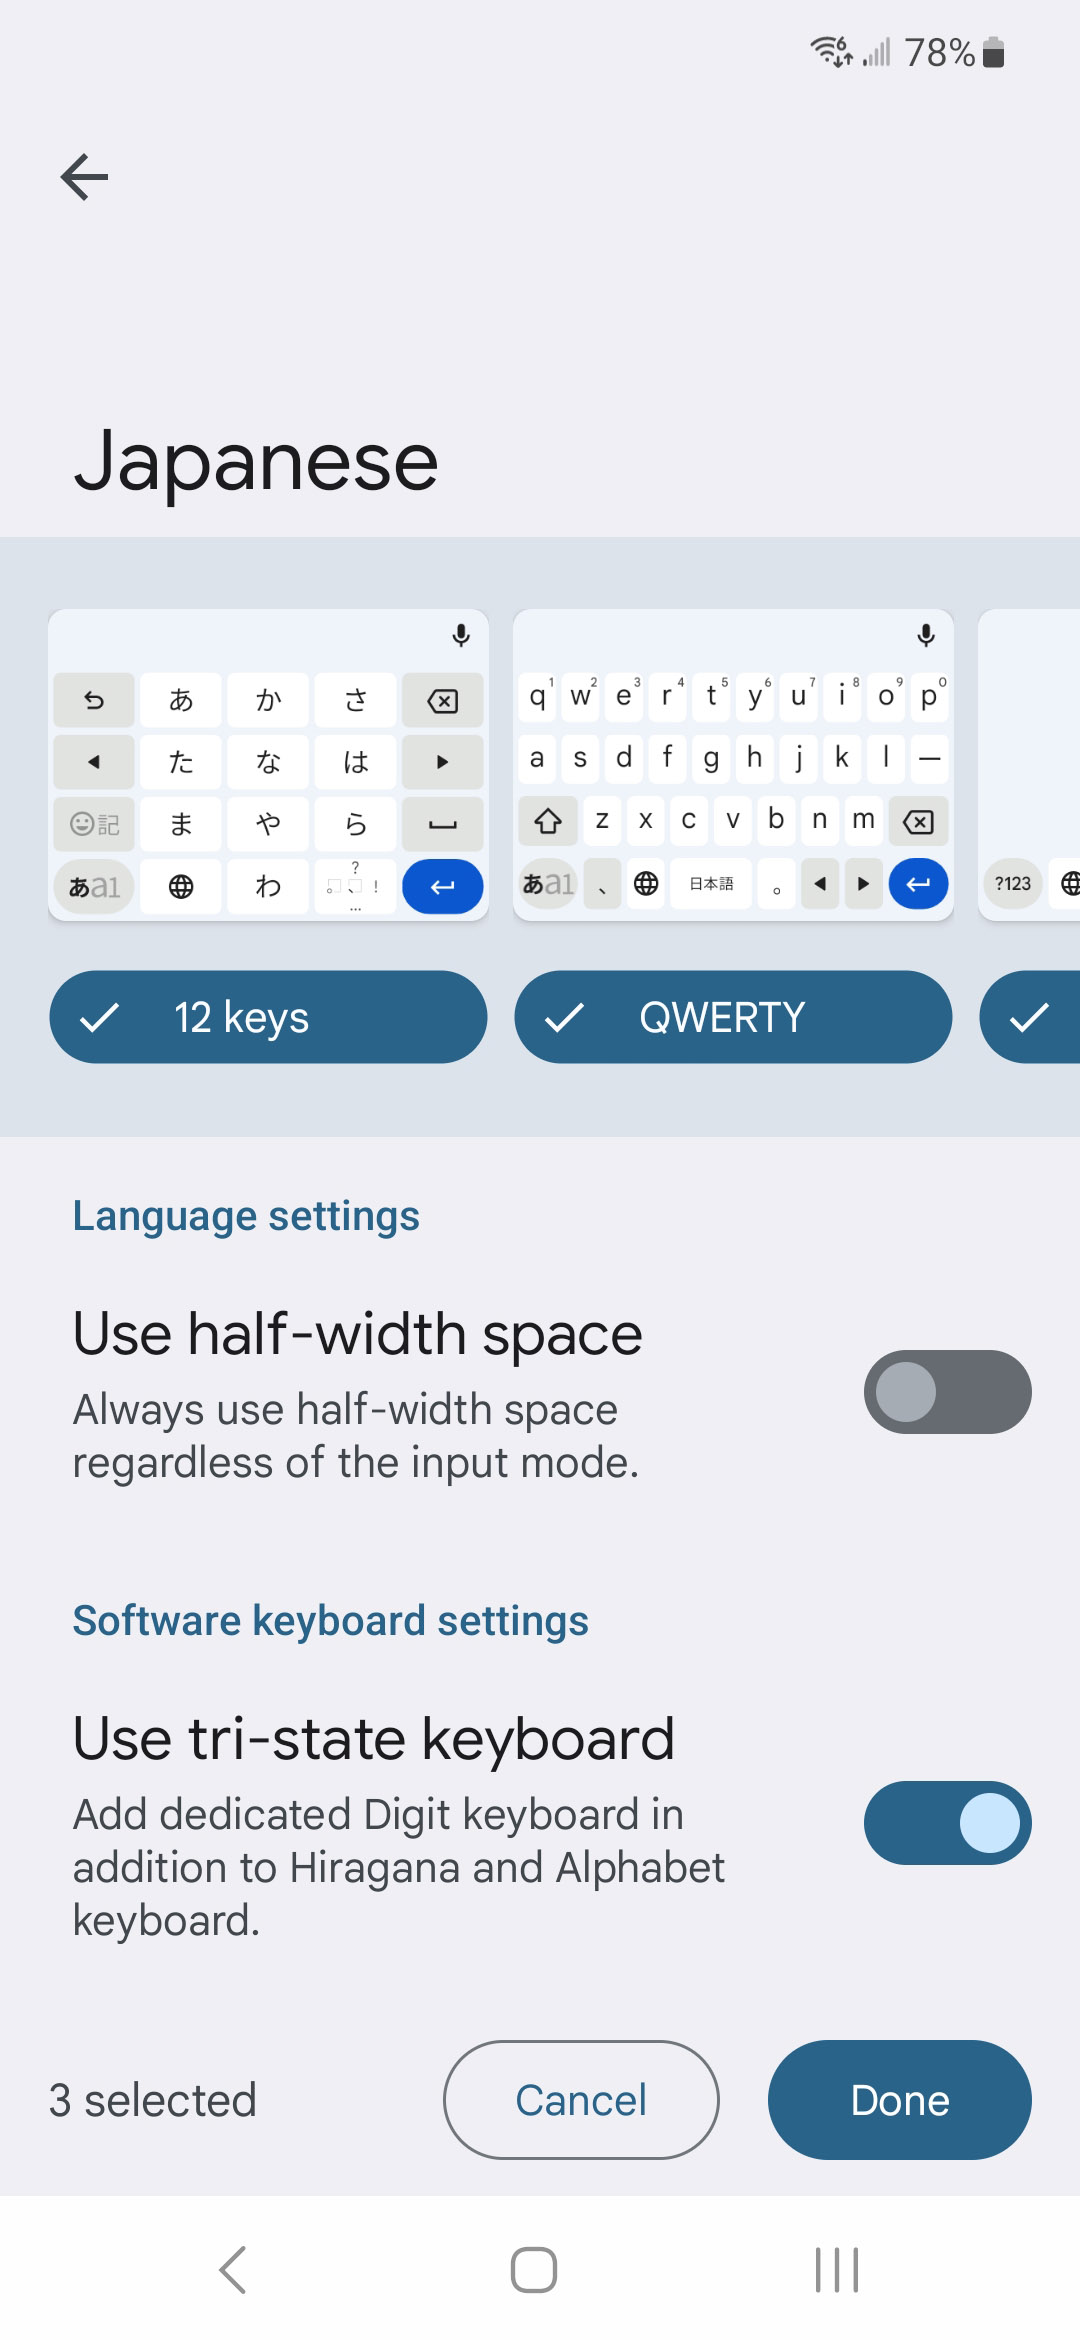
You'll be brought to another settings menu for the Japanese keyboard. Select your preferred methods of input at the top of the screen and tap Done
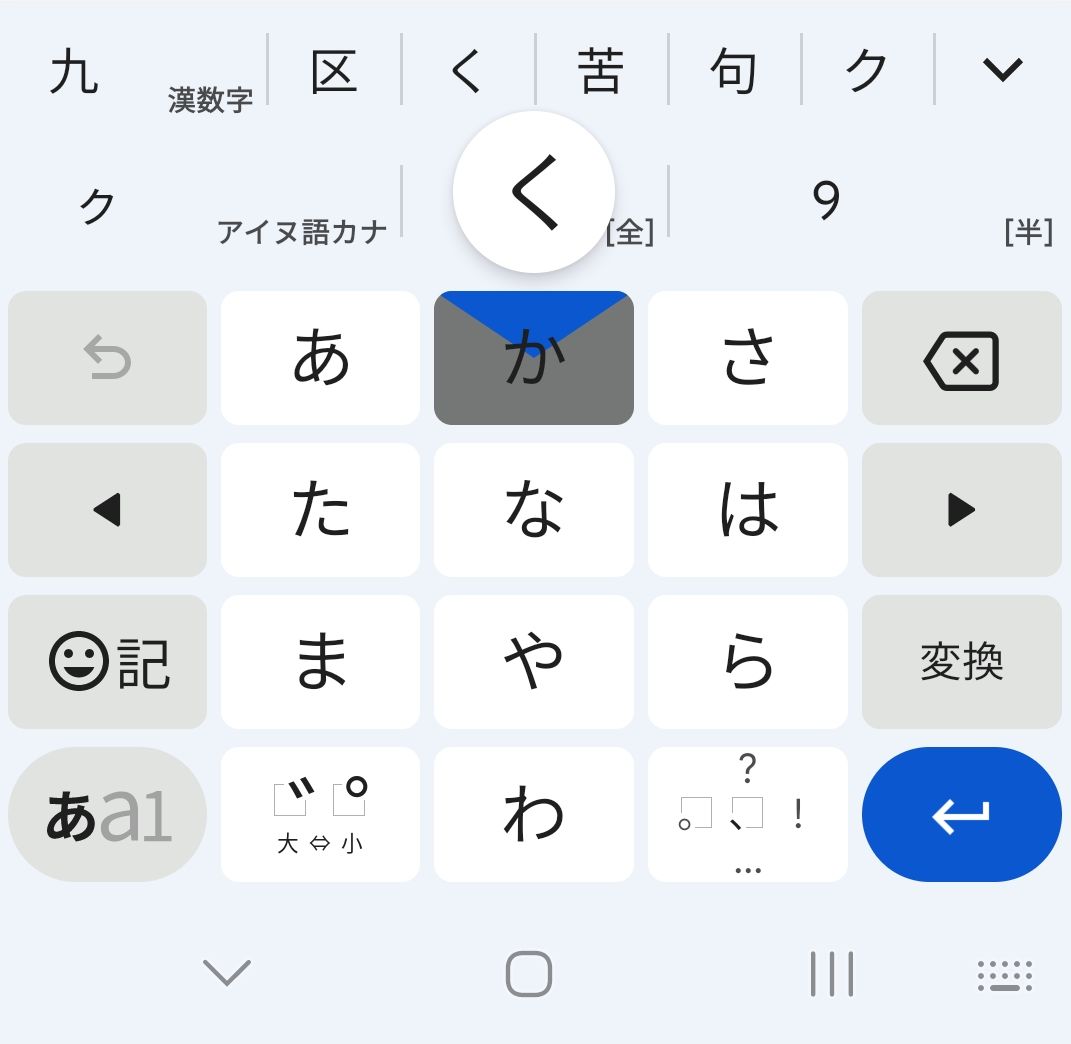
Now when you go to type, you can click the (new) little globe near the bottom left to switch between your different languages and input methods within Gboard.
Here is your new keyboard:
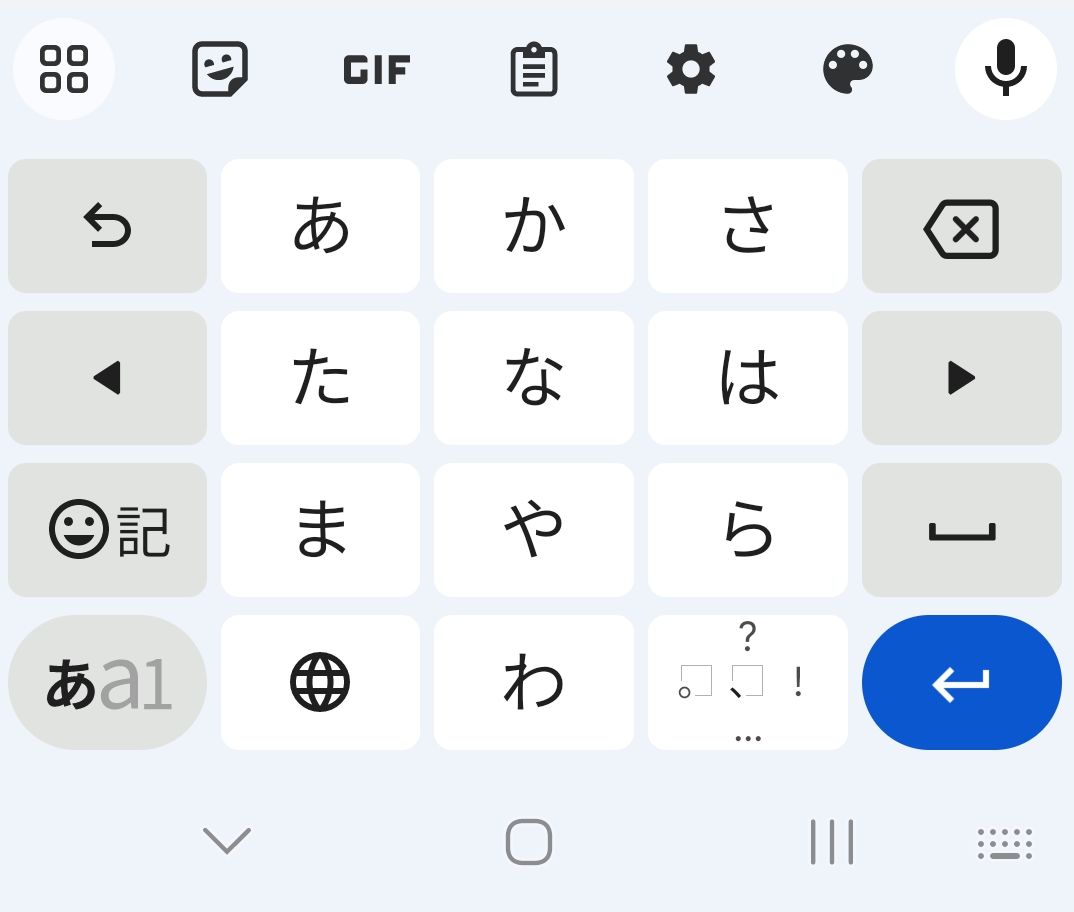
You tap and pull toward the character you'd like to input.
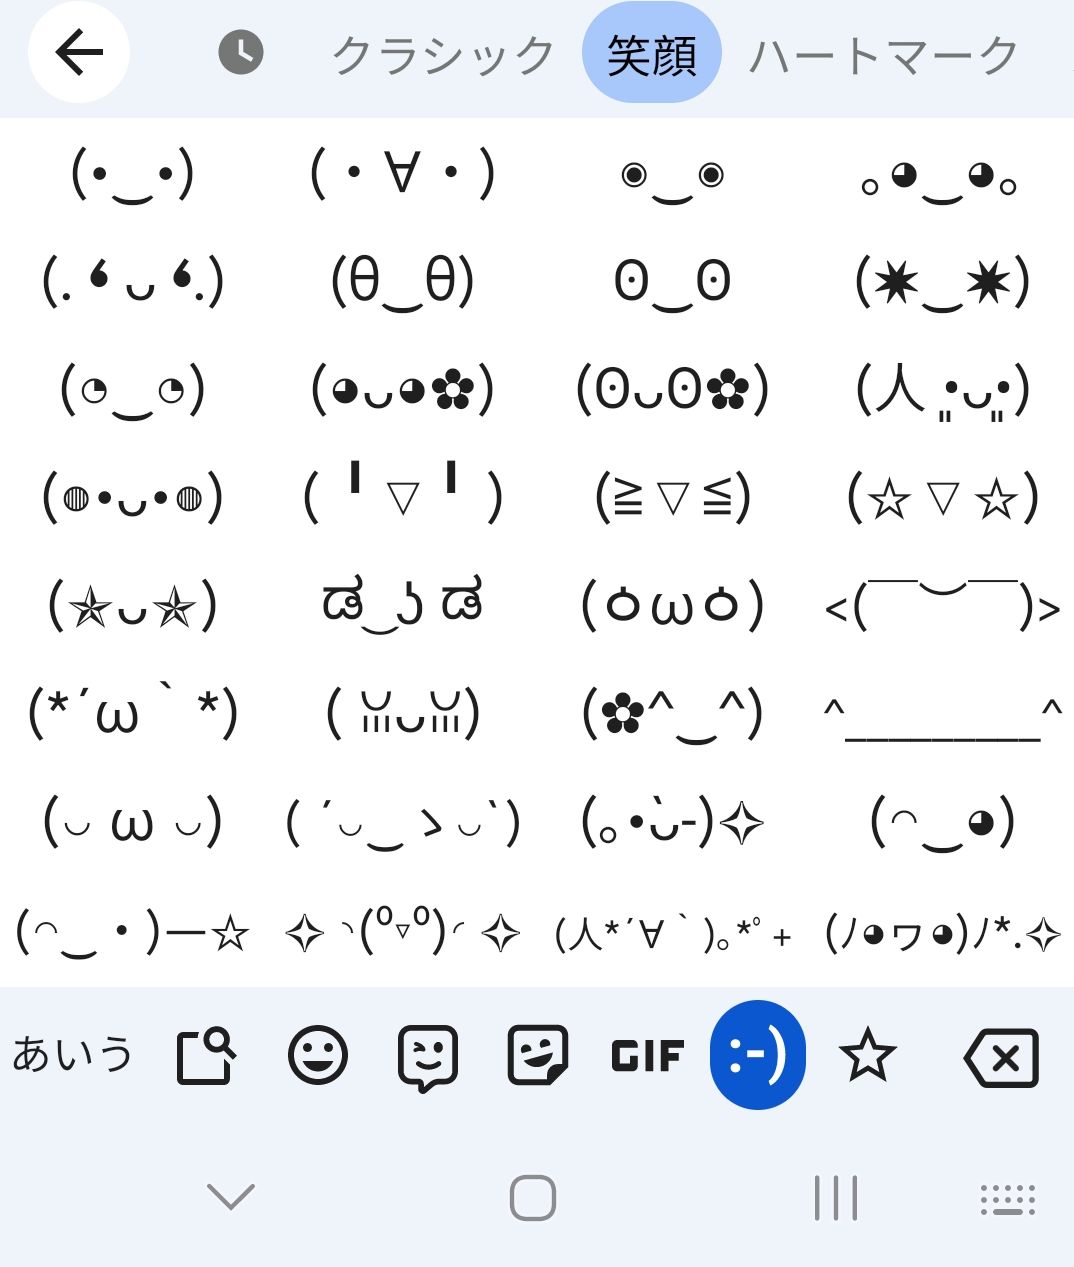
And even better, there is a kaomoji keyboard built in!
If you enabled other input methods from the Japanese settings screen, you can tap the globe icon on your keyboard to switch between your different Japanese input methods!
And there you have it! You know how to install Japanese keyboard inputs. More than you ever dreamed. But what to do with them?
Check out our follow-up article where we teach you how to type in Japanese, using some of the keyboards you just installed. See you there!